
Dehancer for Baselight | Full Setup Tutorial
Downloading and installing the plugin
Downloading and installing the plugin / macOS
1. Make sure that your computer meets the system requirements for the plugin to work correctly.
2. Download the latest version of the plugin from Dehancer.
2.1. Go to the Products → Baselight plugin.
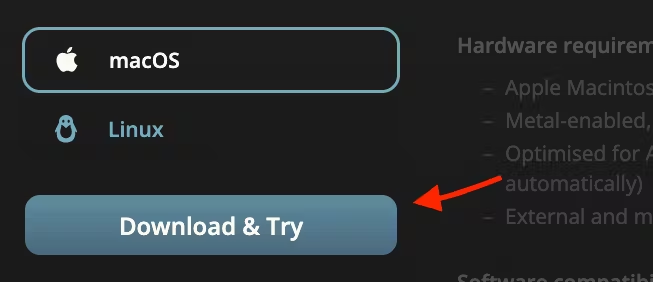
2.2. Select macOS as your operating system on the product page.
2.3. Hit Download & Try button. Your download will start automatically.
3. Unzip the downloaded zip file, if your system didn’t do it automatically.
4. Make sure that Baselight is not running. Please, keep it closed until installation is complete.
5. Run the installation file and follow the installation steps.
6. Normally, older plugin versions will be removed during the installation procedure automatically. If the update does not technically allow to maintain the grading settings compatibility, new version will be installed as a separate, independent plugin.
7. Restart Baselight.
Downloading and installing the plugin / Linux
1. Make sure that your computer meets the system requirements for the plugin to work correctly.
2. Download the latest version of the plugin from Dehancer.
2.1. Go to the Products → Baselight plugin.
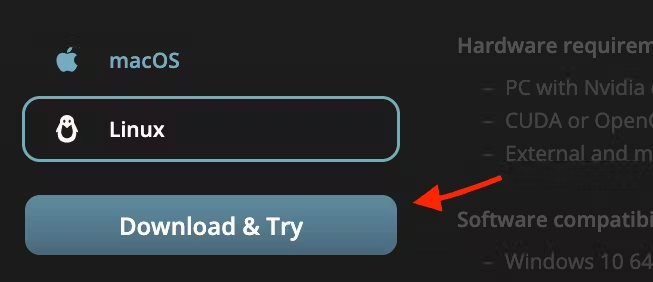
2.2. Select Linux as your operating system on the product page.
2.3. Hit Download & Try button. Your download will start automatically.
3. Unpack the downloaded tar.gz file as usual.
4. Make sure that Baselight is not running. Please, keep it closed until installation is complete.
5. Run the installation file and follow the installation steps.
6. Normally, older plugin versions will be removed during the installation procedure automatically. If the update does not technically allow to maintain the grading settings compatibility, new version will be installed as a separate, independent plugin.
7. Restart Baselight.
Adding Dehancer to the project
Before you start, you need to add Dehancer to the project. Then you will be able to perform the remaining steps of installation, downloading profiles and License Activation.
Dehancer is applied as a standard Layer to the clips or to the whole timeline via Grade → Layer. Normally Dehancer should be placed on top of the processing chain, just to make all basic corrections before film emulation. Occasionally some specific FX may be placed after the plugin (for example, delivery sharpen, mastering curves, etc.)
Please refer to the Dehancer Baselight Plugin Quick Guide for more information about the workflow and Dehancer tools.
Downloading Film Profiles
Before using Dehancer you have to download film profiles.
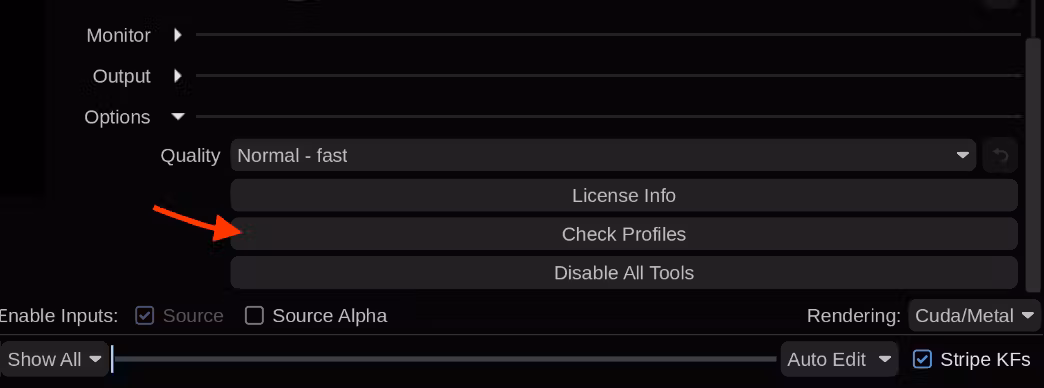
1. Navigate to the bottom of the plugin settings and find the Check Profiles button. This allows you to download or update the profiles at any time.
Studio plan users are getting the profiles directly from Dehancer server (internet connection is required).
Production plan users are getting the profiles from the local Production Server. Please launch the License widget first and enter the Production Server URL to activate the plugin. Then you will be able to download the profiles as usual.

2. The Dehancer Profiles widget will open and the Film profiles will be downloaded and installed automatically.
3. Once the profiles download/update is complete, close the widget with the OK button.
Now Dehancer is ready to use.