

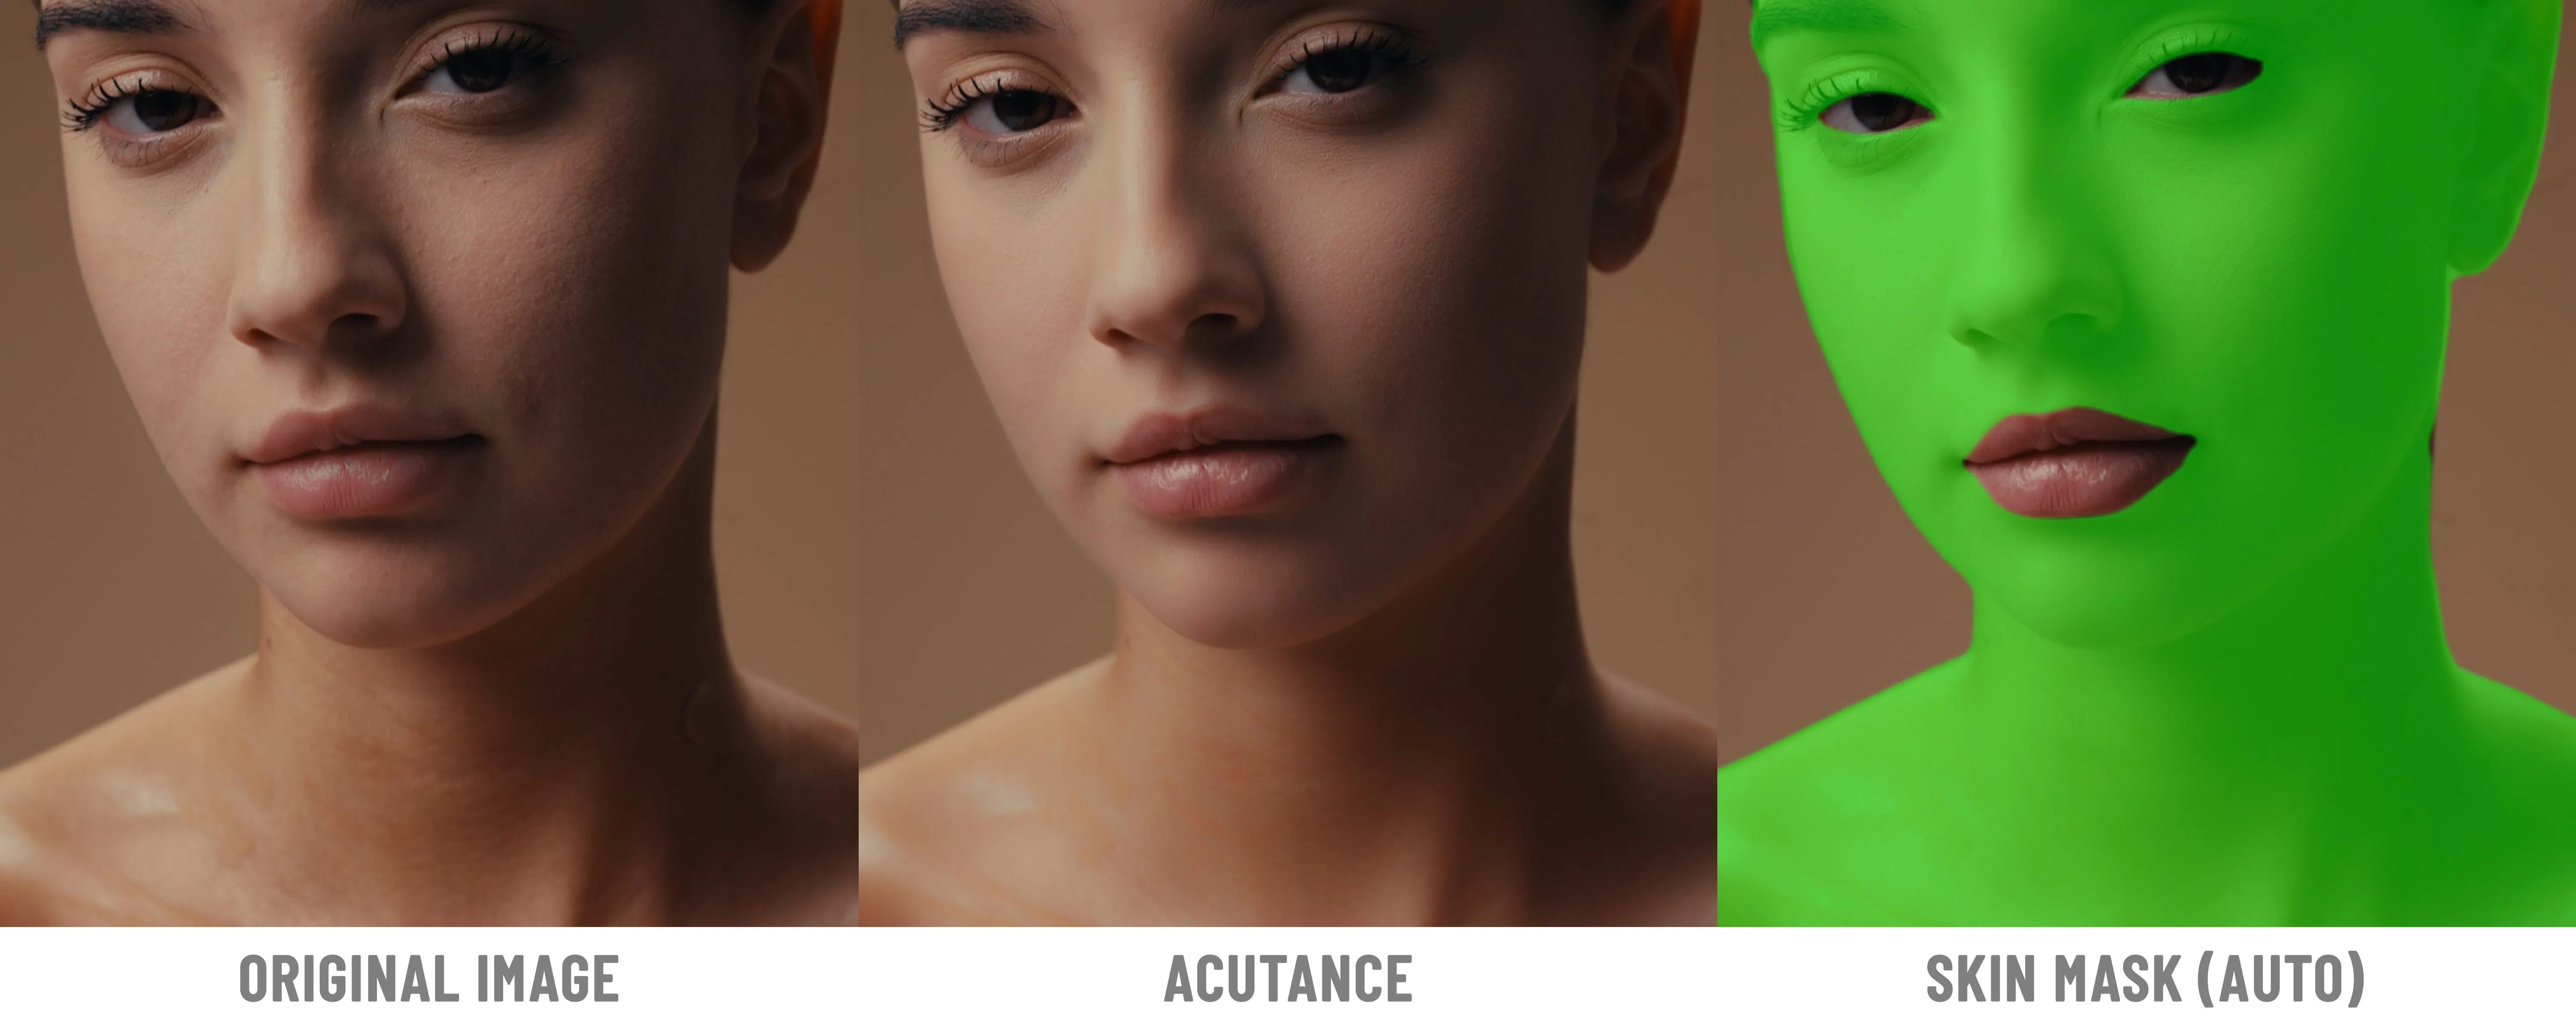
An analog image resulting from photochemical processes is naturally soft, as many factors progressively reduce sharpness and microcontrast on the journey from the original scene to the finished print.
Digital images typically feature sharper gradients in the areas of high-contrast edges and fine details (such as skin texture, grass, etc.), and automatic processing is usually aimed at further enhancing sharpness and microcontrast. Modern optics also strive for an ideal MTF curve, which, when combined with aggressive digital algorithms, can lead to excessive sharpness and often manifests as characteristic digital artifacts – such as halo effects, posterization, etc.
With Dehancer film emulation tools, you can give your image an analog look and minimize these flaws.
For example, Film Grain completely transforms the image structure by emulating three-dimensional granules in the emulsion layers, while the Film Resolution parameter allows you to optically adjust the overall softness.
However, in practice, this is not enough to fully control the smoothness of tonal transitions.
Furthermore, aesthetic goals call for a variety of approaches. Depending on the style and content of the shot, either increasing or decreasing sharpness and microcontrast may be necessary. Generally, this also applies to the medium- and large-sized details.
That's why we created a dedicated tool for managing micro- and macro-contrast: Acutance. The name is derived from the terminology of film processing and printing and reflects the analogue principle, which all Dehancer tools faithfully adhere.
What is Acutance?
Acutance is a complex phenomenon that characterizes the level of detail and local contrast. It affects the texture, the smoothness of tonal transitions, and the edge sharpness of an image.
Acutance depends on several factors:
1. Emulsion Type and Properties
Film grain has a three-dimensional structure and directly affects optical microcontrast.
As light passes through the emulsion layers, it is reflected and refracted, producing effects like halation and bloom, even when optically perfect lenses are used and all other conditions for a high-quality image are met (in particular, camera shake is completely eliminated, and the correct exposure and aperture setting are applied).
2. Processing Method and Recipe
The developing process not only reveals the latent image on film, but also alters its structure, since the wet emulsion is quite mobile, and the chemical processes in different areas of the image progress nonlinearly, affecting local contrast.
During development, silver halides form aggregates, and the emulsion layers may shift slightly. This leads to visible changes in edge sharpness and microcontrast. By varying the formulas and development methods, it is possible to influence these processes to some extent in order to obtain a sharp, textured image or to soften it.
3. Mechanical Stress and Aging
Repeated mechanical and thermal stresses during development and printing cause further changes in the emulsion. Over time, the film inevitably degrades and its properties change, and the image gradually loses its original sharpness.
4. Printing
The structure of the optical print is greatly affected by the type of the enlarger or other printing device, the choice of projection lens, the photographic paper (or other printing medium), and the processing method – for example, the use of special techniques such as unsharp masking, diffusion filters, split-printing, and manual masks of specific objects and areas within the shot.
Thus, in analog processes, we can largely control microcontrast and sharpness to solve both technical and creative challenges.
Acutance in the Digital World
When working with digital photos and videos, the objective remains the same: depending on the specific task, to achieve an image that is, to a greater or lesser extent, sharp and textured or soft and smooth.
Most modern image-editing tools allow you to adjust sharpness and local contrast. Dehancer is no exception, but unlike other software, it traditionally emulates real analog effects. This allows you to address a number of specific issues characteristic of digital images and give them a more complete, film-like look.
Let's take a look at the Acutance tool settings.
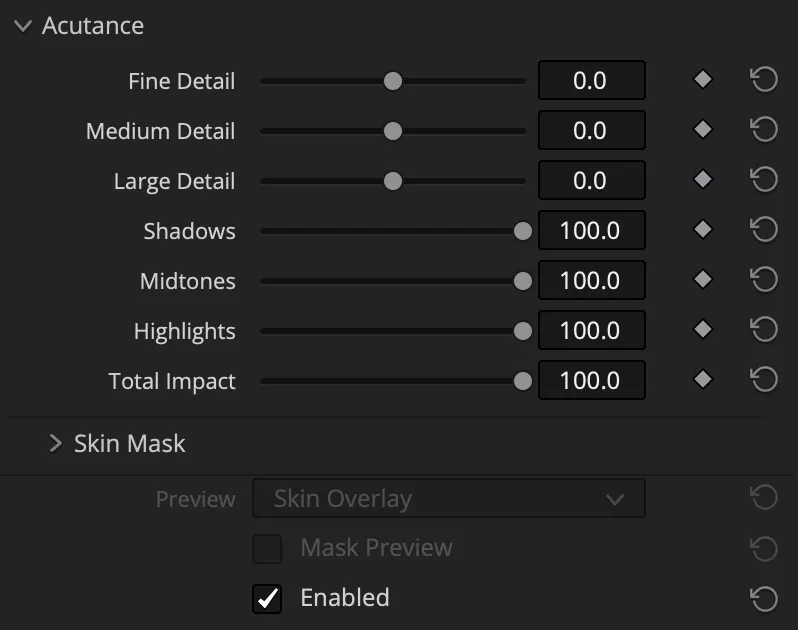
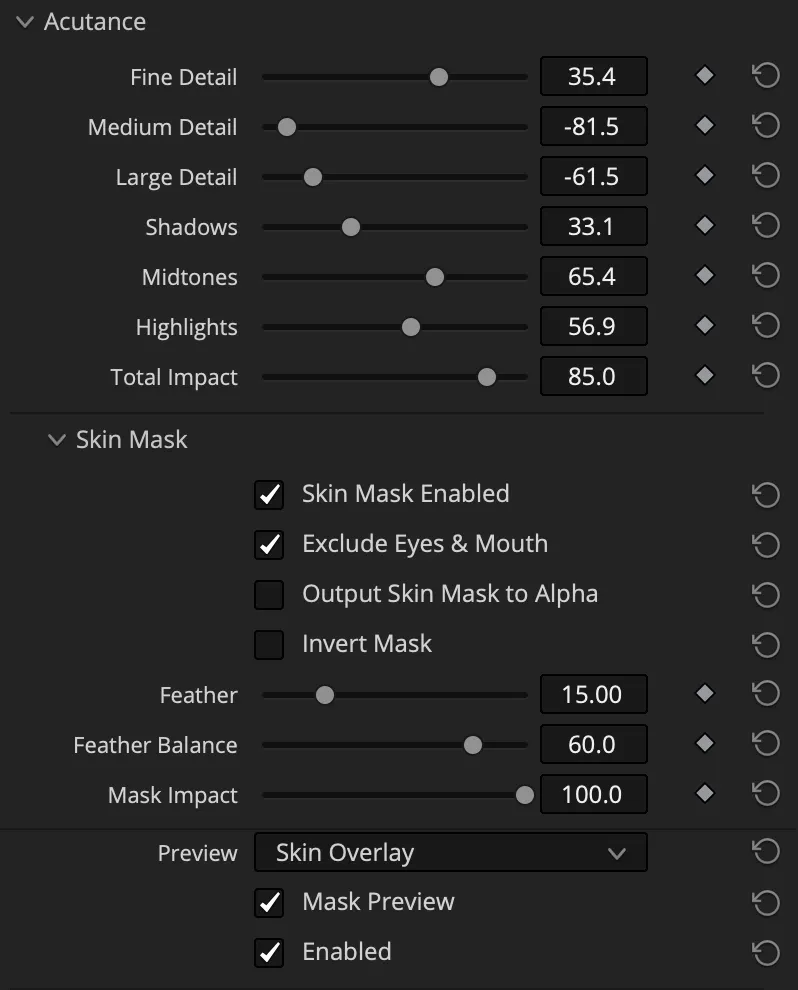
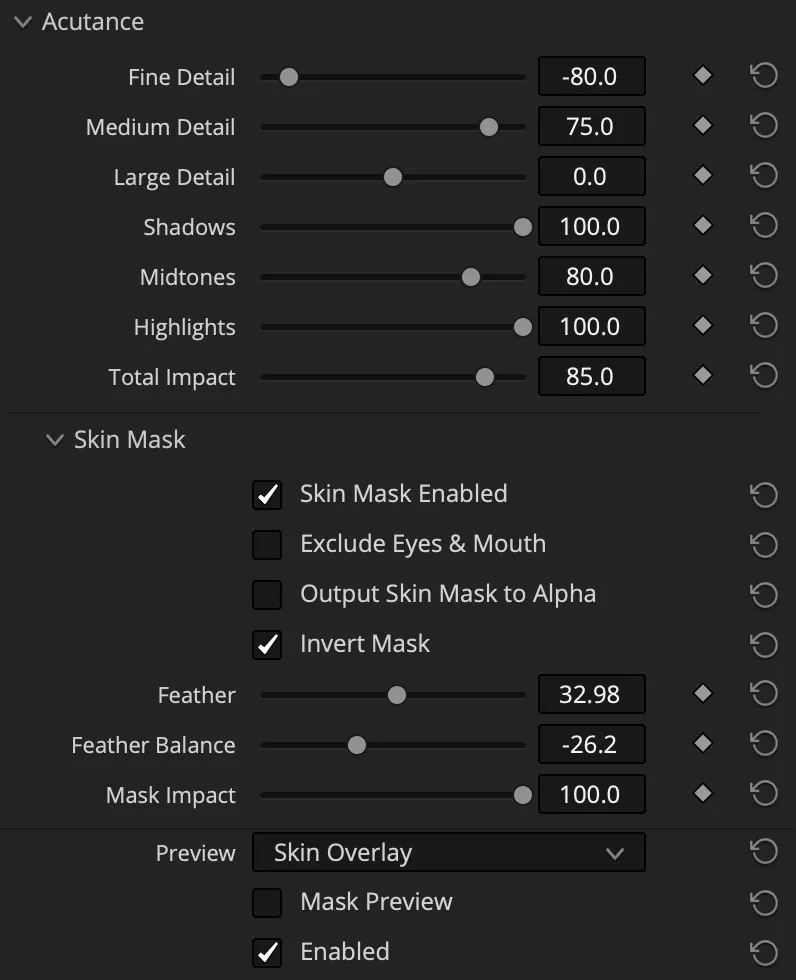
Fine Detail / Medium Detail / Large Detail
This parameters group lets you control local contrast, making the image soft and smooth or textured and dramatic.
The effect of Medium Detail is somewhat similar to that of the Midtone Detail tool in DaVinci Resolve – it enhances or softens the contrast of medium-sized details in the midtone tonal range, including areas with facial features and skin texture.
The key difference is that Dehancer allows you to control medium, small, and large details separately. For example, when editing portraits, this allows you to adjust the fine skin texture (Fine Detail), emphasize or smooth out wrinkles and imperfections (Medium Detail), or correct the overall tonal balance of the face (Large Detail).
Positive values make the image more textured, while negative values smooth out details and help reduce excessive texture – for example, to make skin appear softer and cleaner.
Shadows / Midtones / Highlights
This group of settings allows you to adjust the intensity of the effect separately for shadows, midtones, and highlights.
A value of 100 corresponds to the maximum effect. A value of 0 means that the effect is not applied.
Total Impact
This parameter controls the overall intensity of the effect.
Enabled
Turns the effect on or off completely.
Skin Mask
The applications of the Acutance effect are significantly expanded through the use of masking tools. The same approach allows us to selectively control micro- and macro-contrast during the optical printing process. This is especially true when printing photographs, where masking can be quite precise (shadow masks cut from opaque materials are often used for this purpose).
That’s why in Dehancer, we’ve enhanced the Acutance tool with a smart Skin Mask that automatically detects skin of any tone, including the face, neck, arms, legs, and other body parts. The scene may contain any number of subjects at different focal lengths – for example, close-ups, waist-length shots, or full-body portraits. The mask can distinguish skin even against a very similar-colored background.
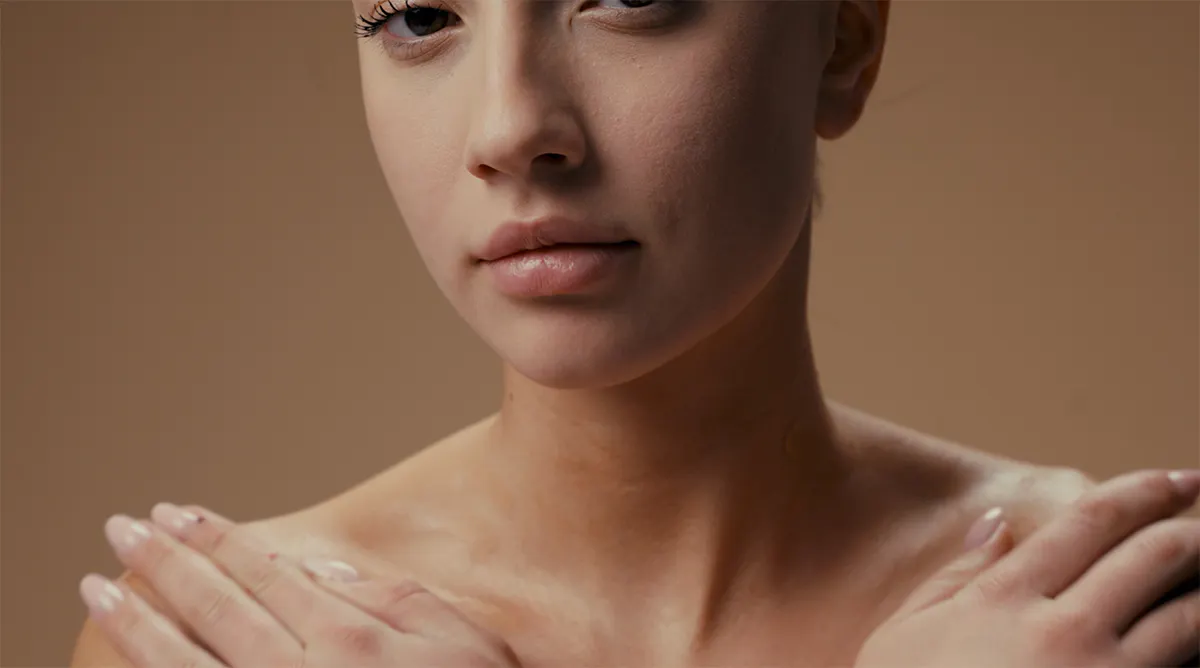
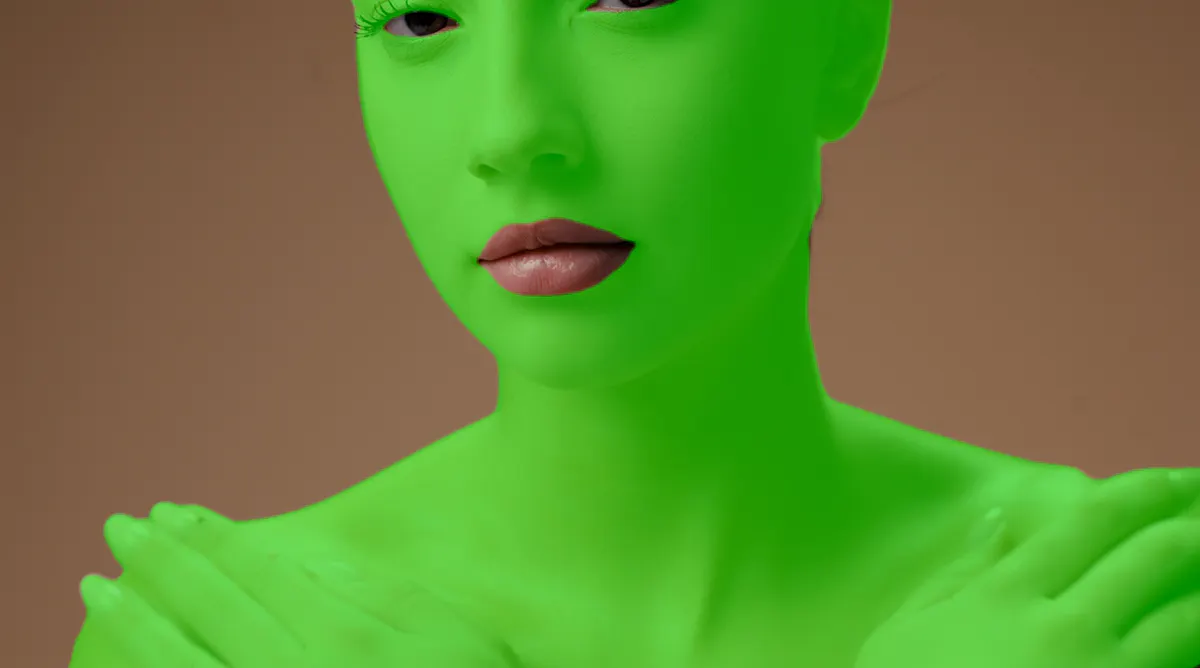

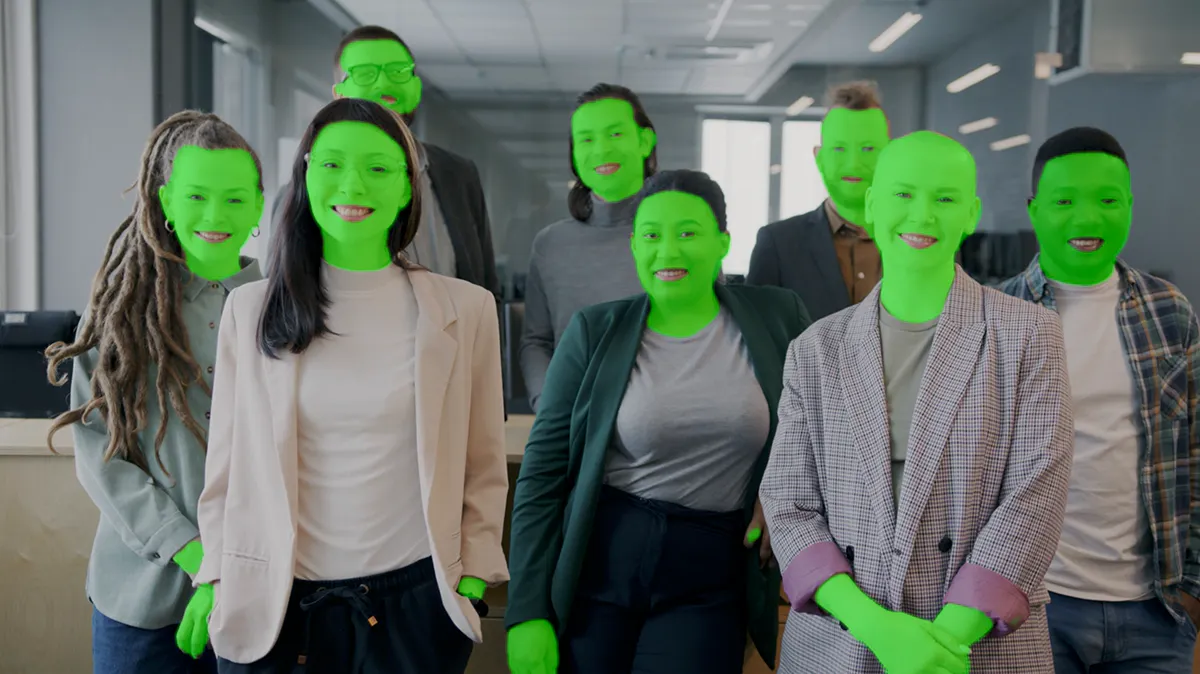
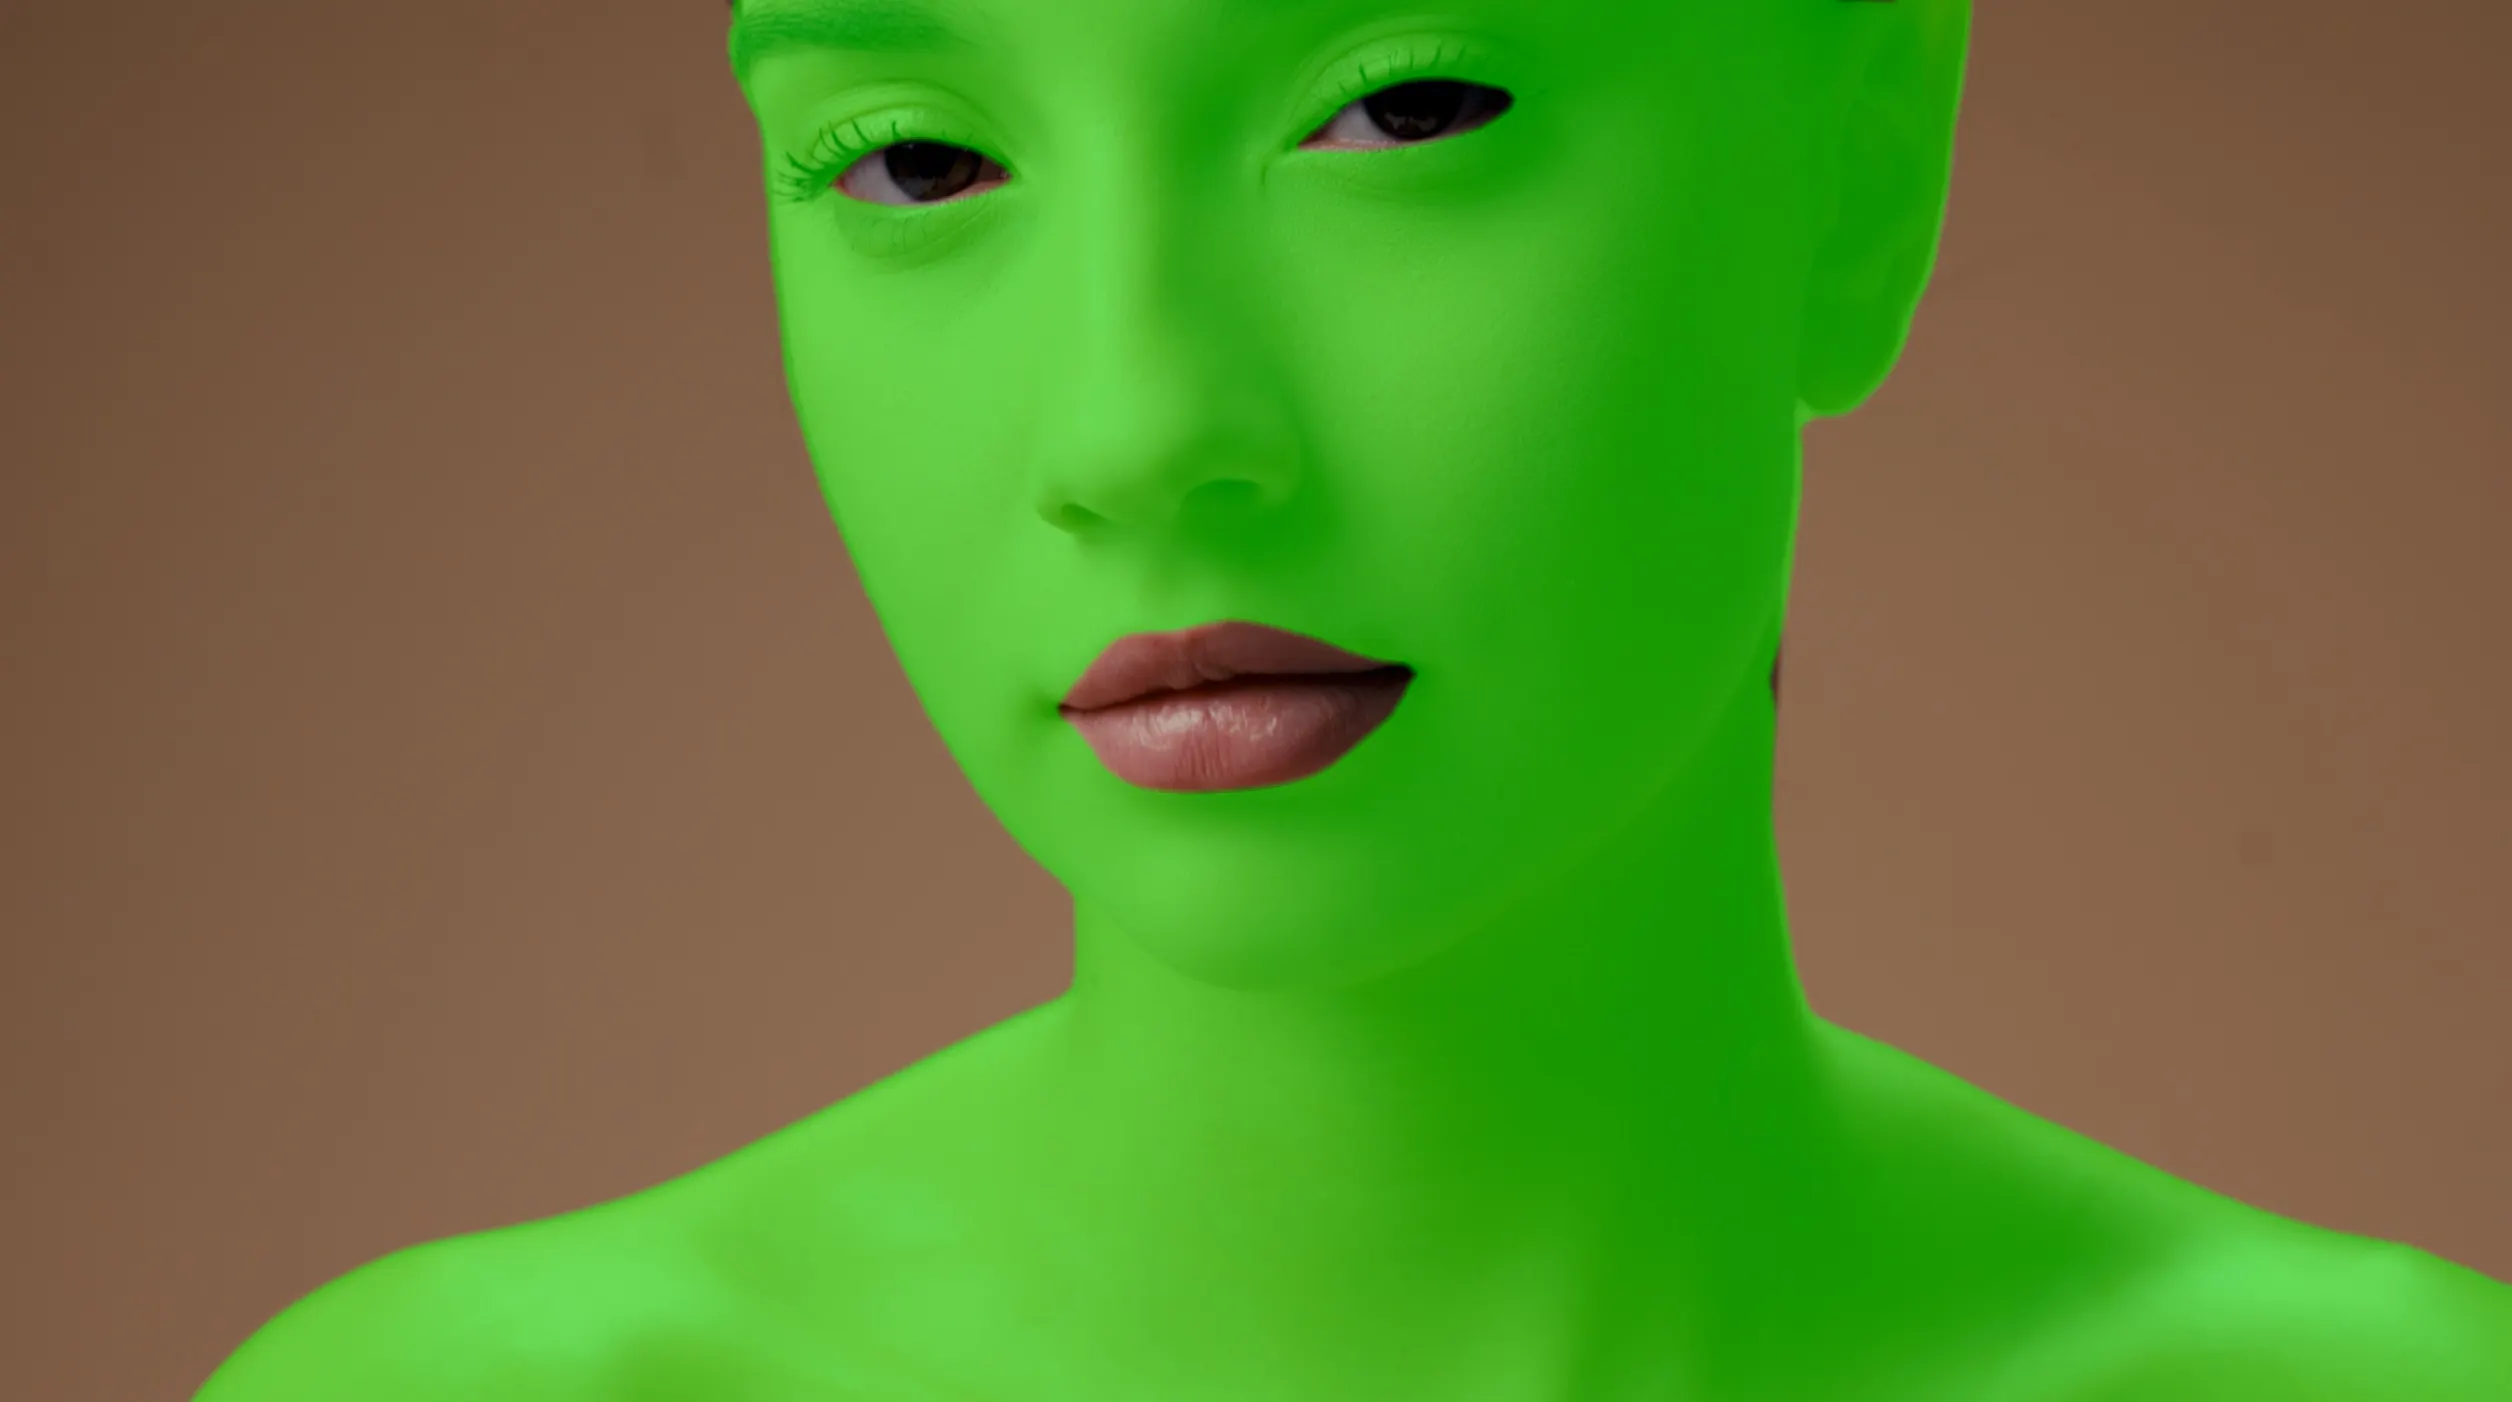
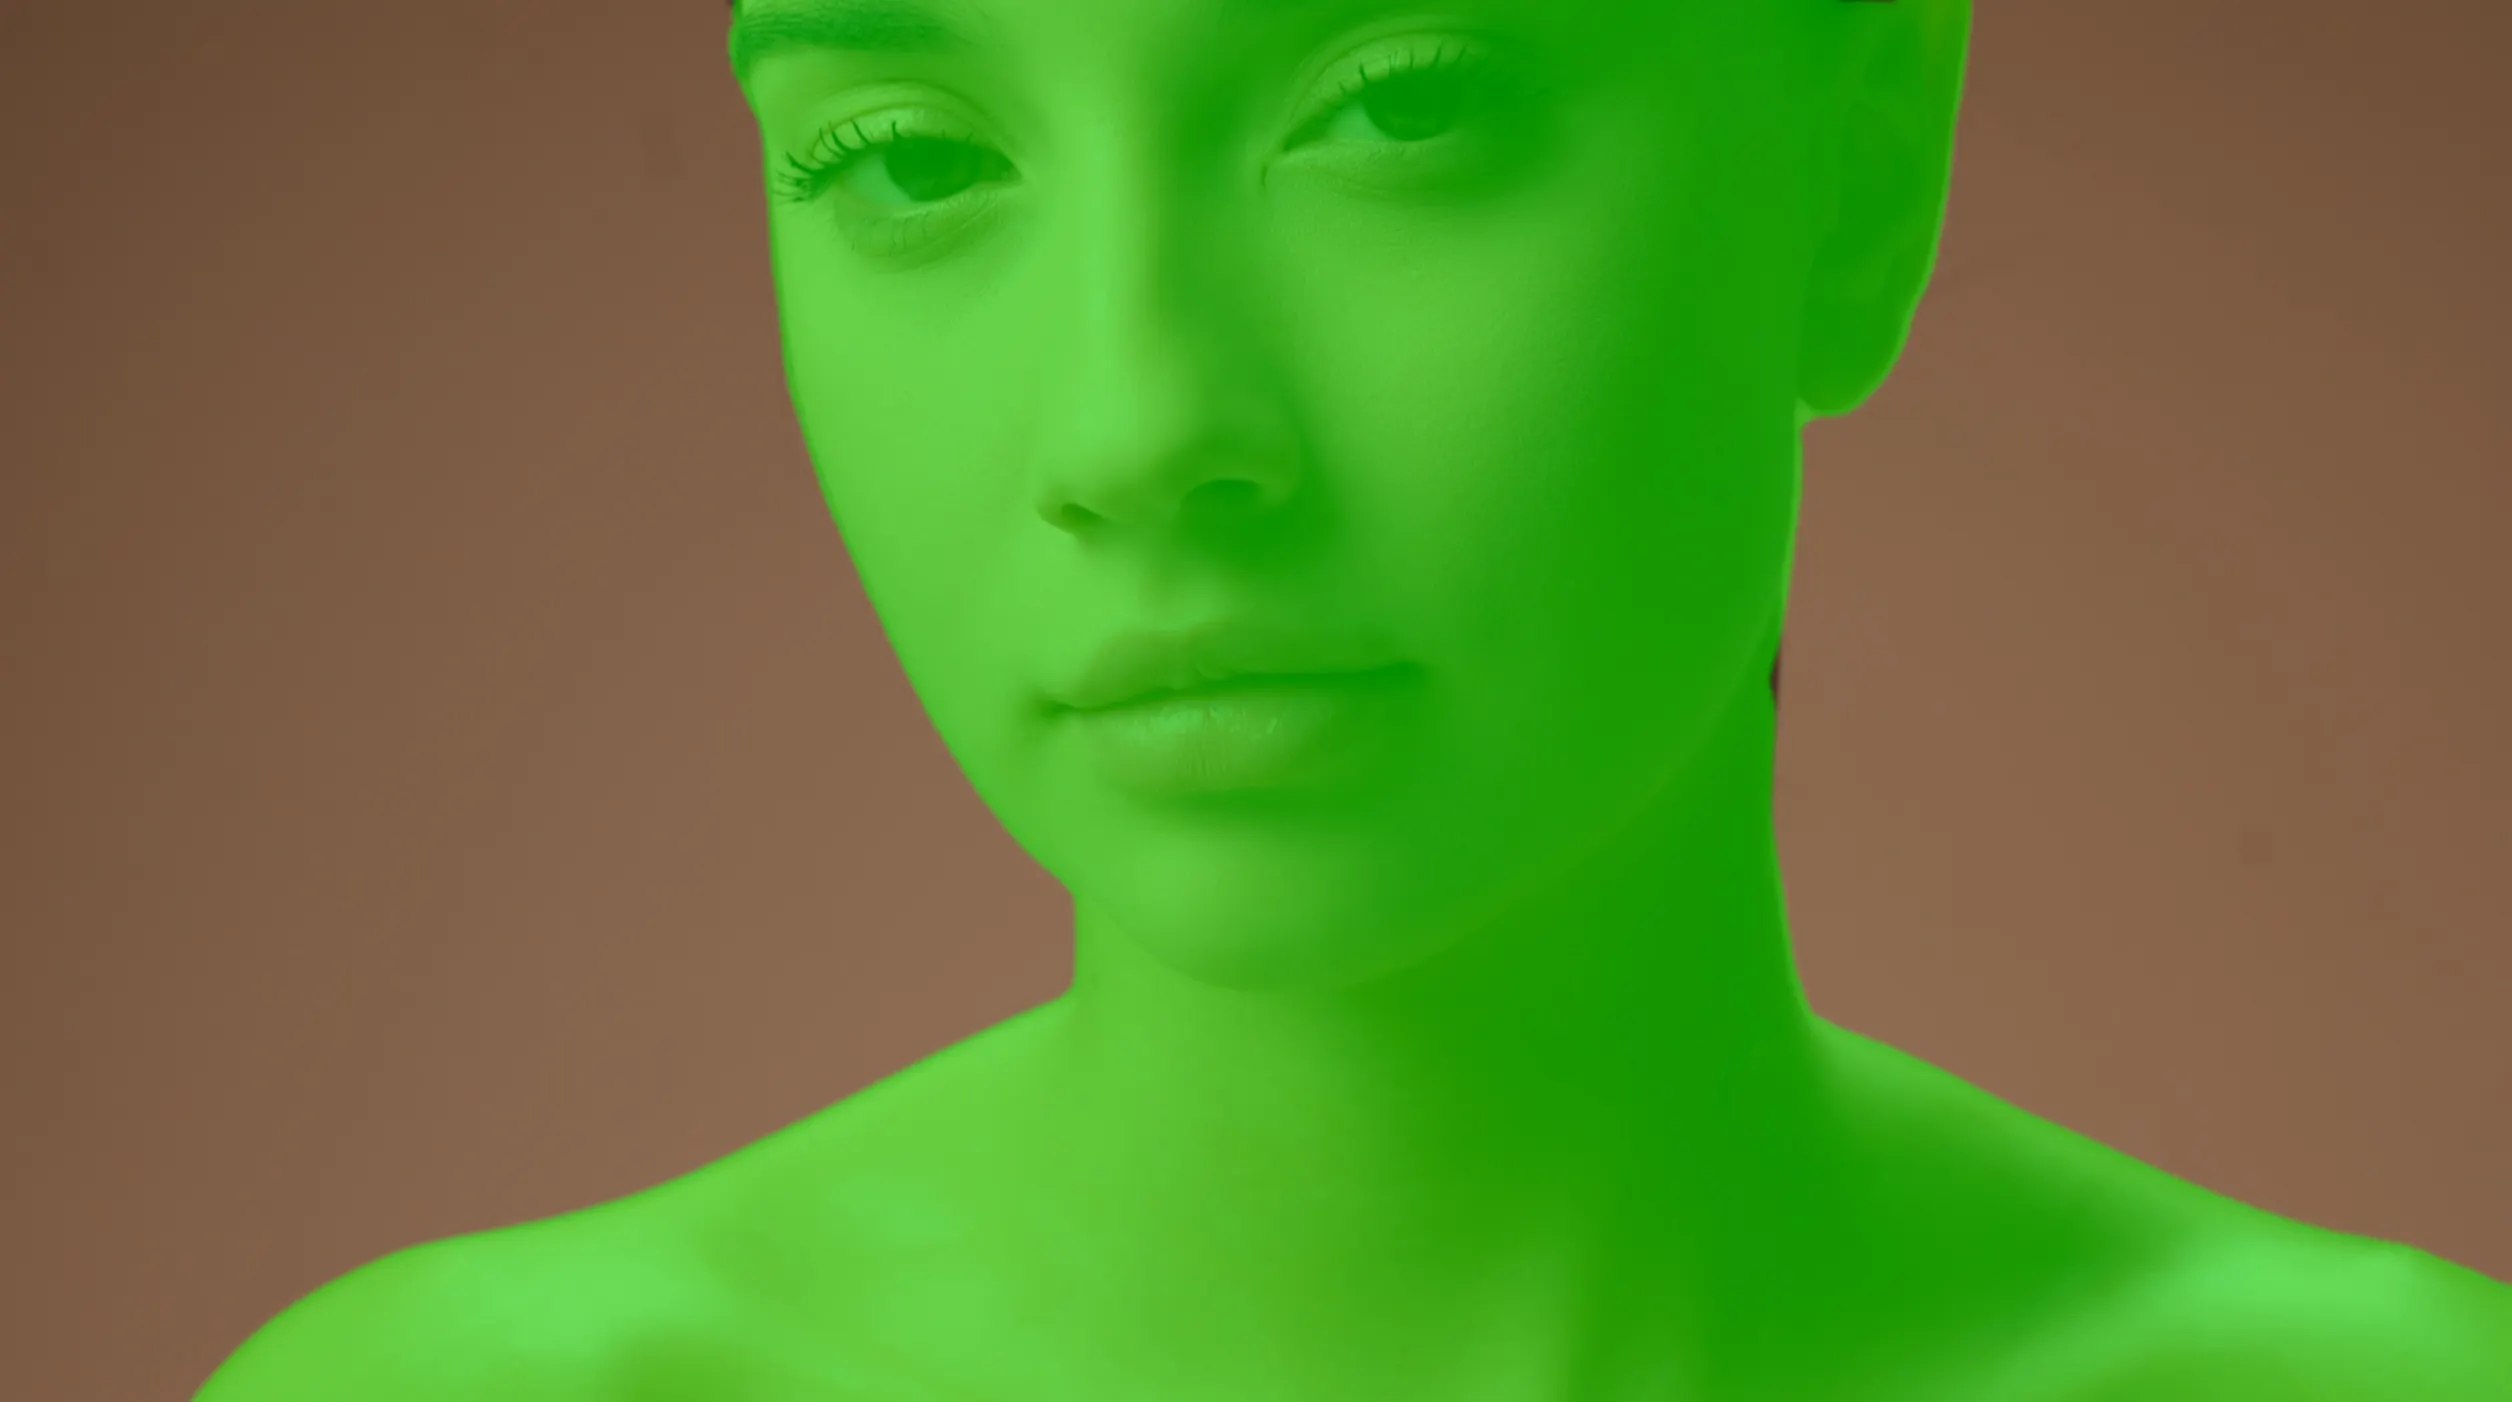
You can exclude the eyelashes, lips, and mouth from the mask so that you can adjust the texture and overall lighting pattern of the skin without affecting them.
Skin Mask is flexible and customizable.
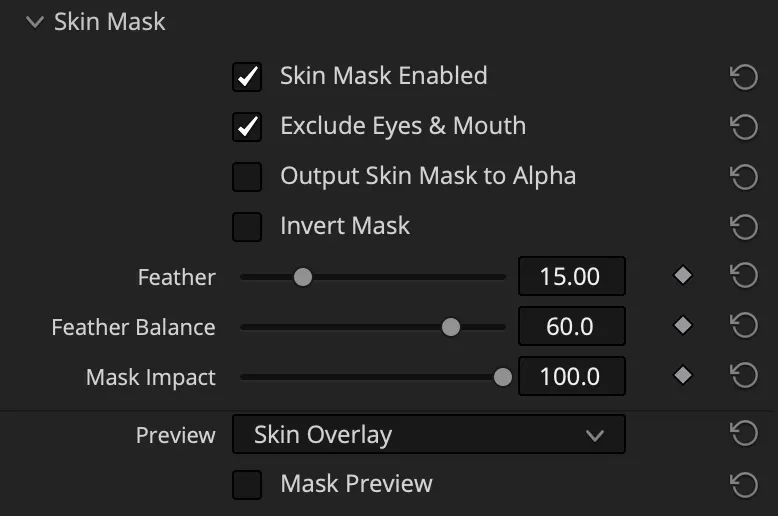
Skin Mask Enabled
Turn the Mask on and off.
Exclude Eyes & Mouth
Allows you to exclude the eyes and mouth area from the mask. By default, this option is enabled, meaning the mask does not include these face features.
Output Skin Mask to Alpha
Outputs the mask to the alpha channel of the current node's output.
Invert Mask
You can invert the mask when you need to apply Acutance to the entire image, excluding human skin.
Feather
This setting controls the blurring of the mask edges to create a smooth transition between the selected object and the background.
Feather Balance
This setting determines the ‘size of the mask – in other words, how far the masking edge is offset inward to the object centre or outward to the background.
Mask Impact
Mask opacity. A value of 100 means that the effect applies strictly to the masked area. A value of 0 means that the effect applies to the entire image, and the mask is completely ignored.
Preview
There are three mask preview modes available: Applied Correction (changes applied), Skin Mask (skin mask only), and Skin Overlay (a green skin mask superimposed on the image).
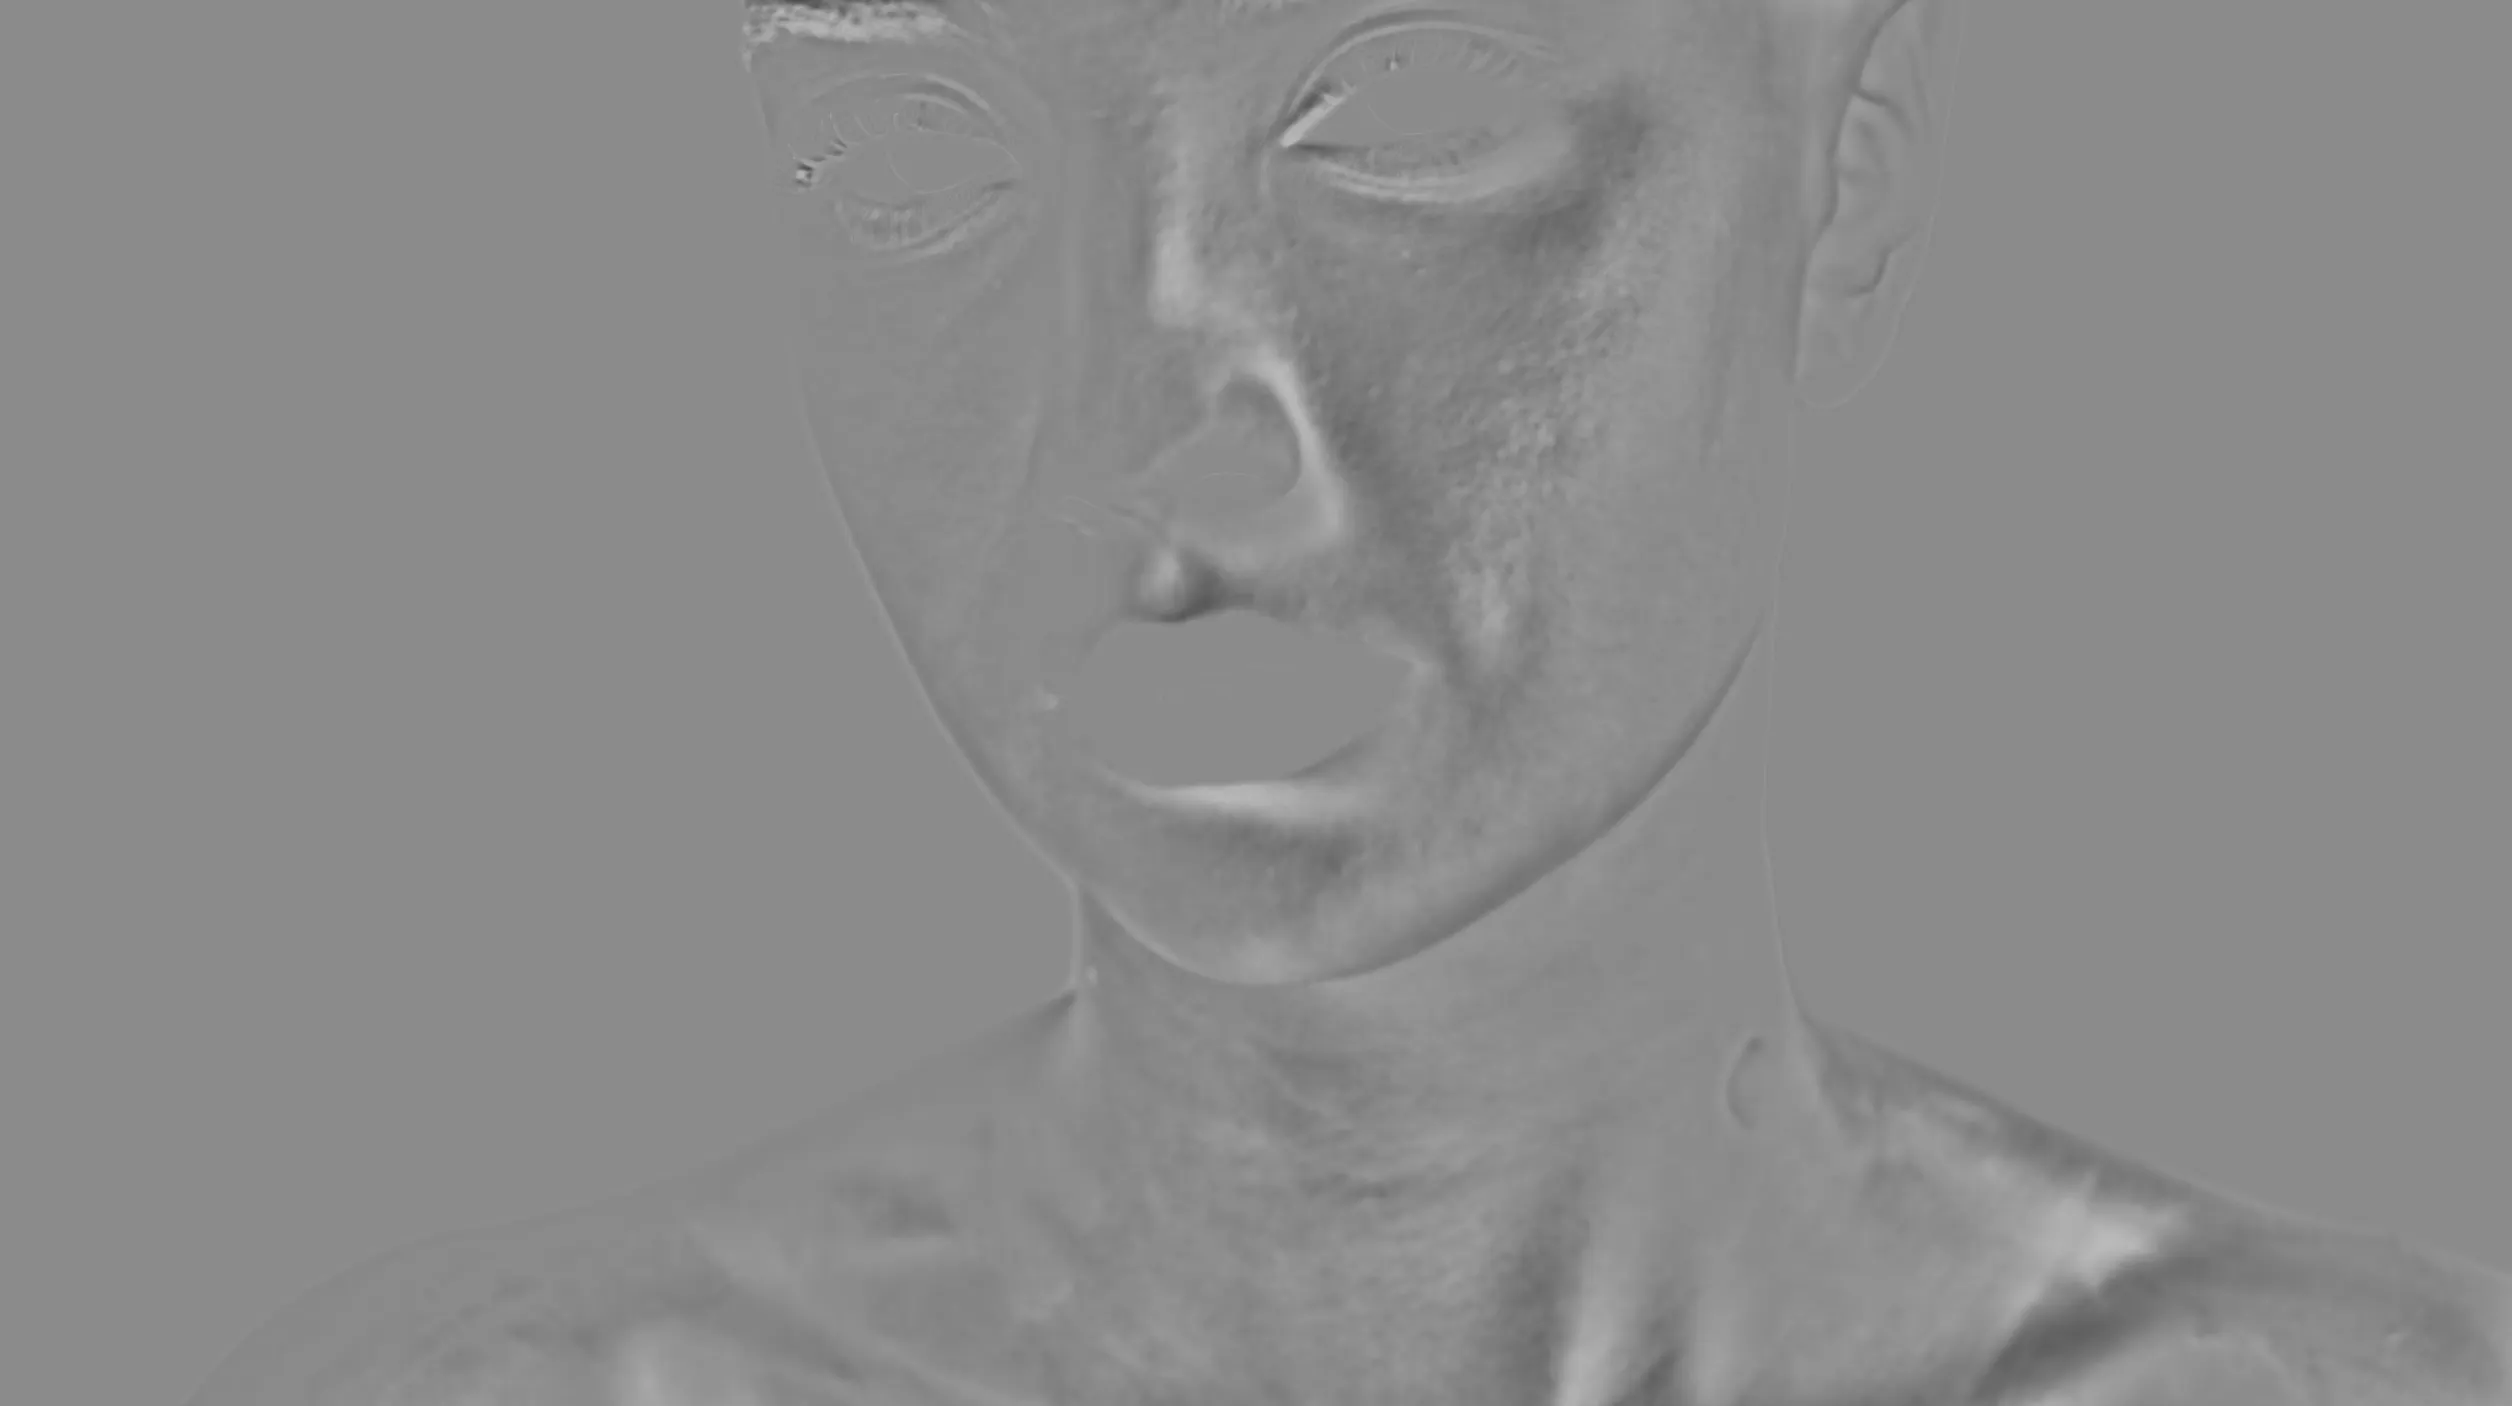

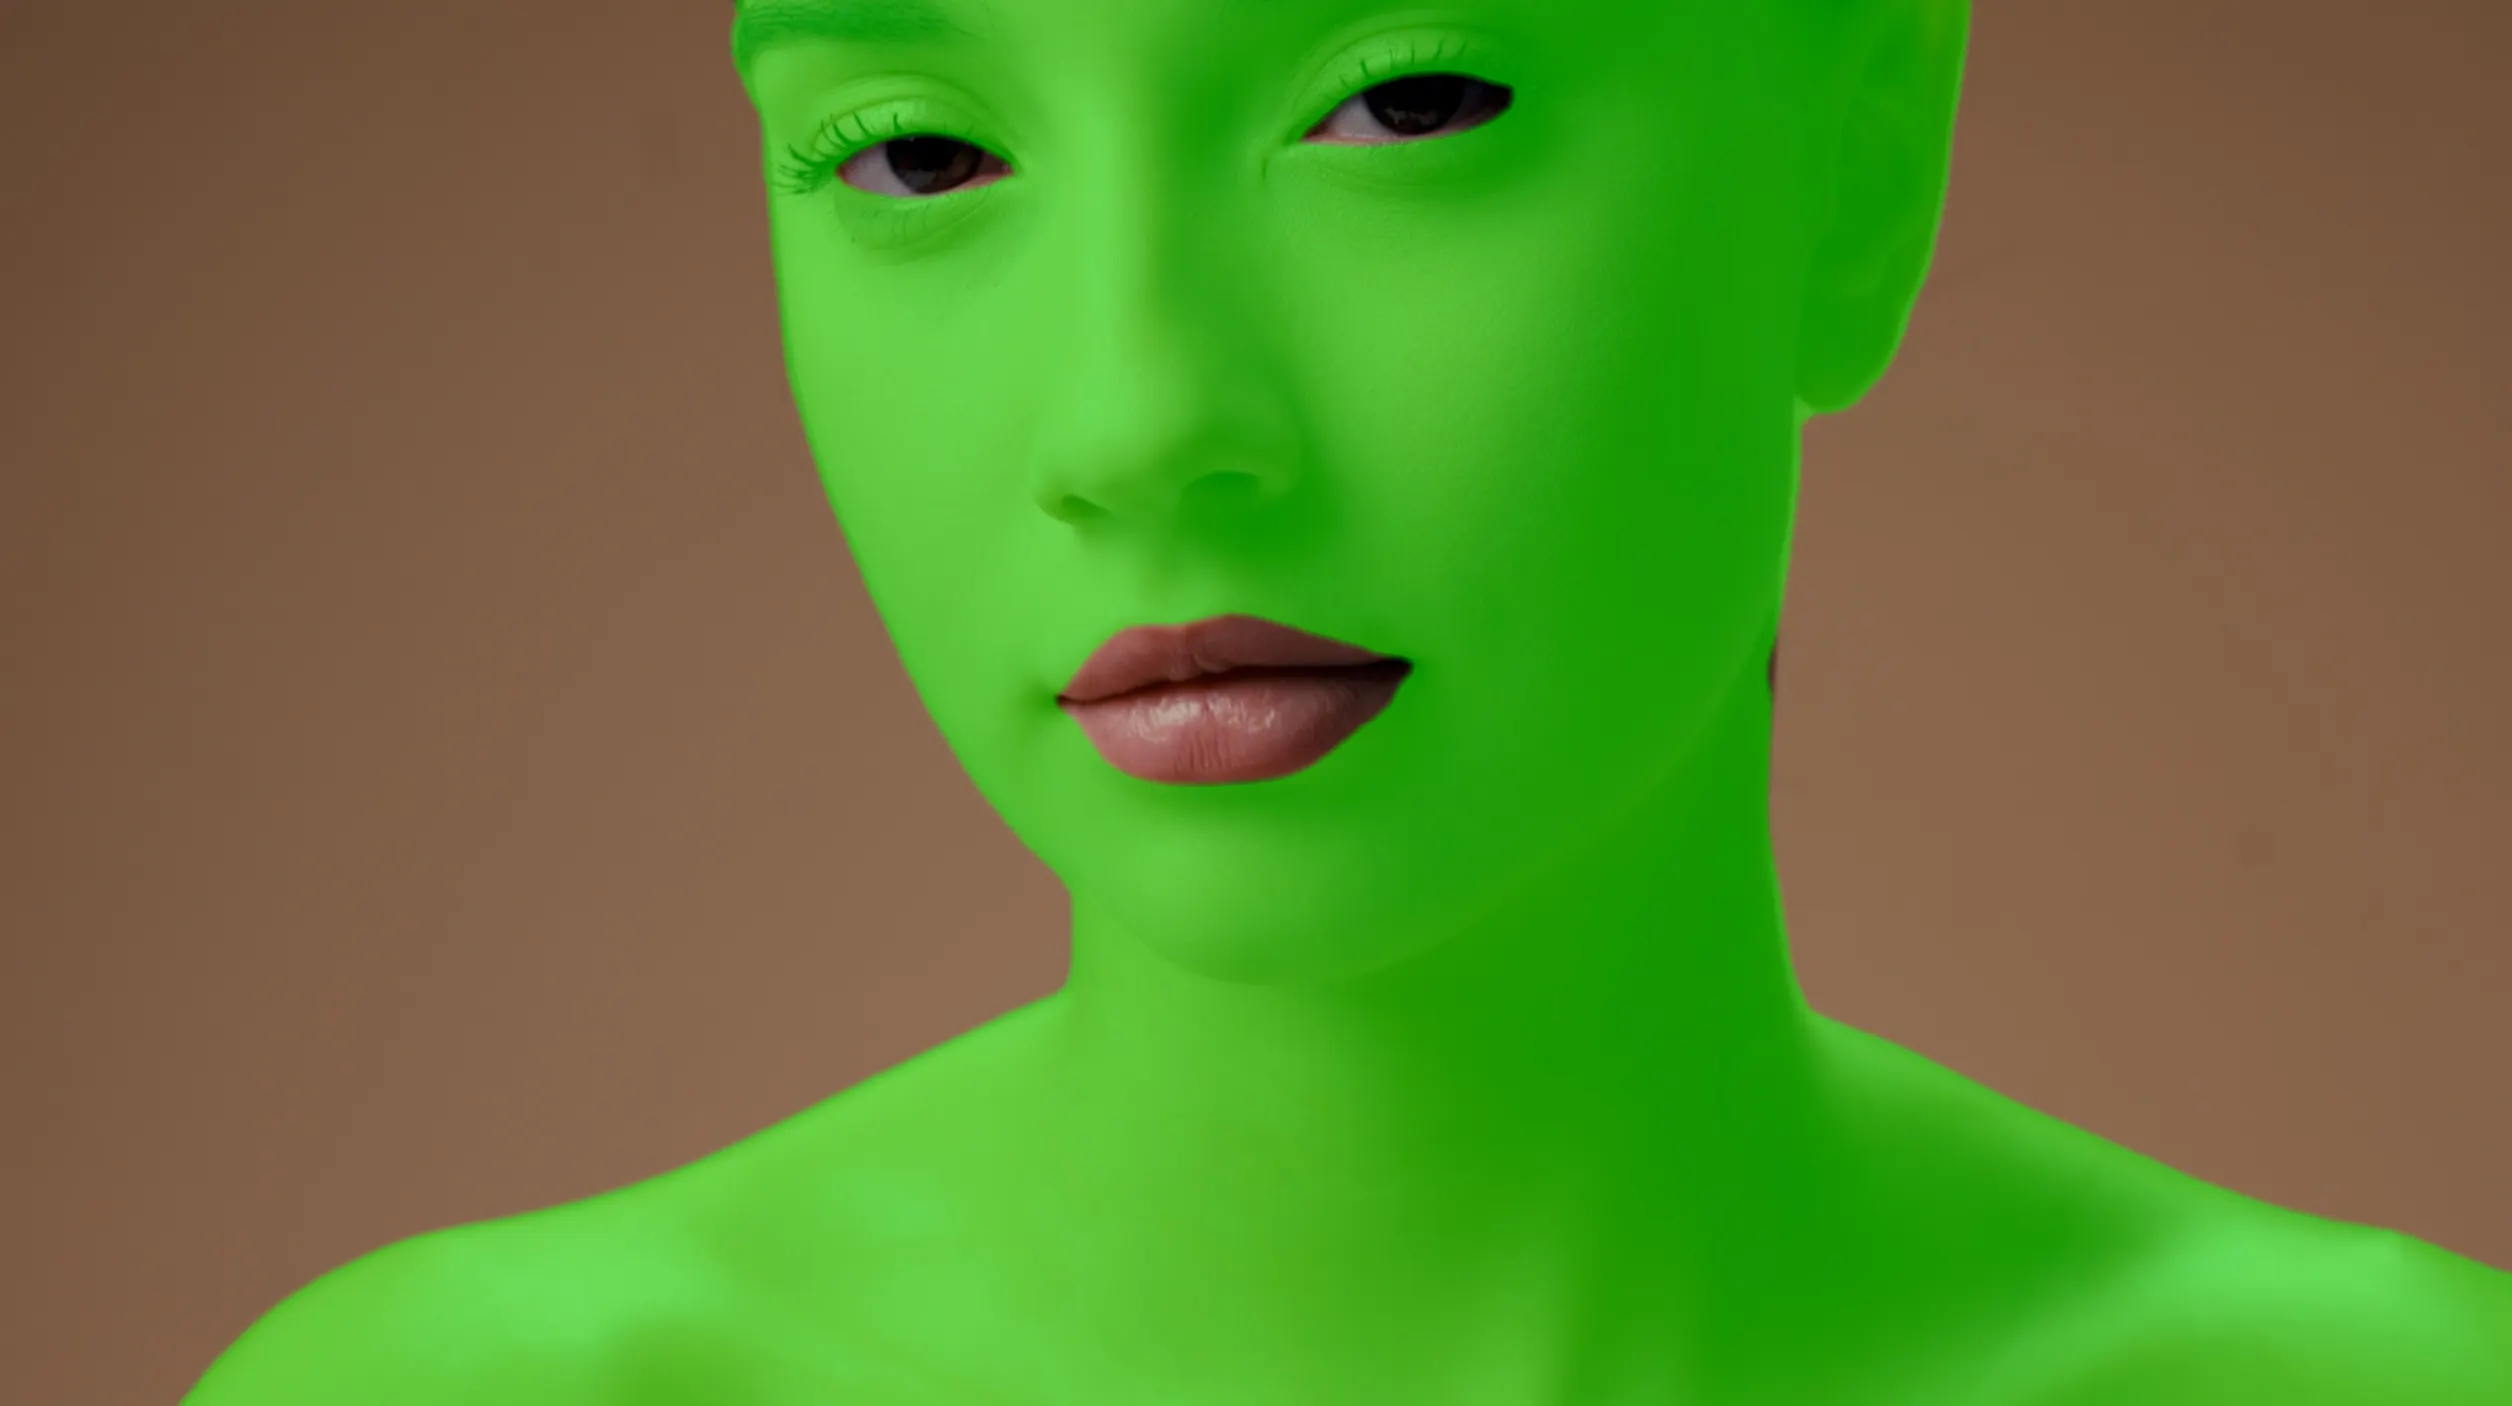
Mask Preview
Turns the mask preview mode on or off.
Here's an example of using the Acutance tool with the Skin Mask applied:
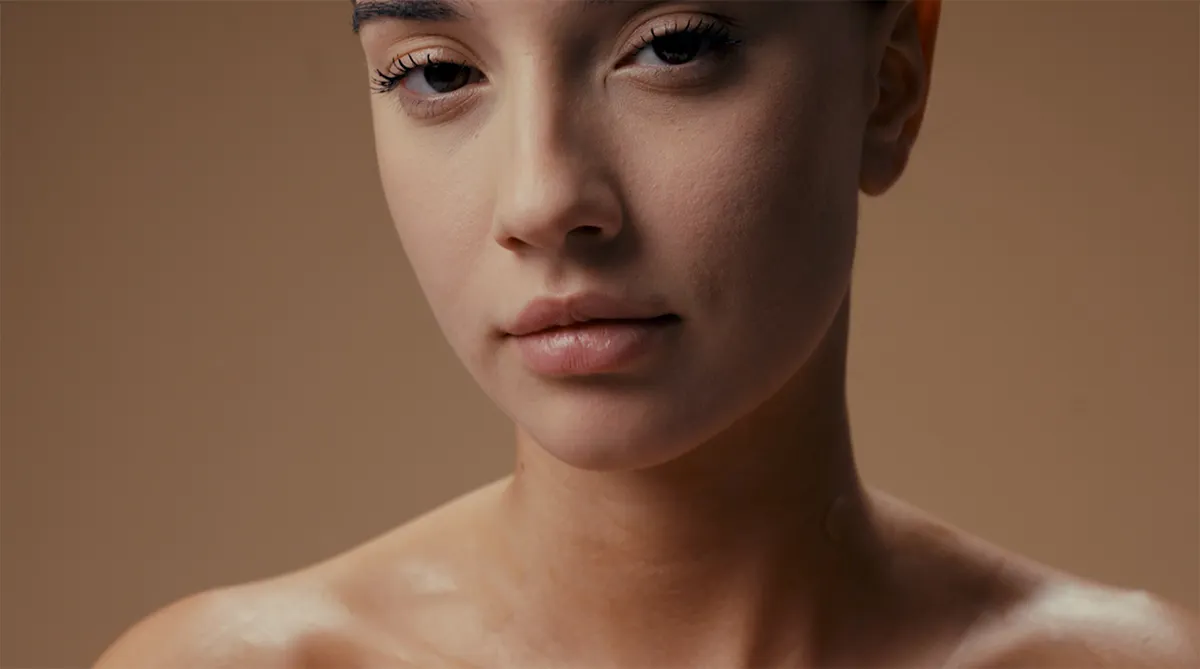
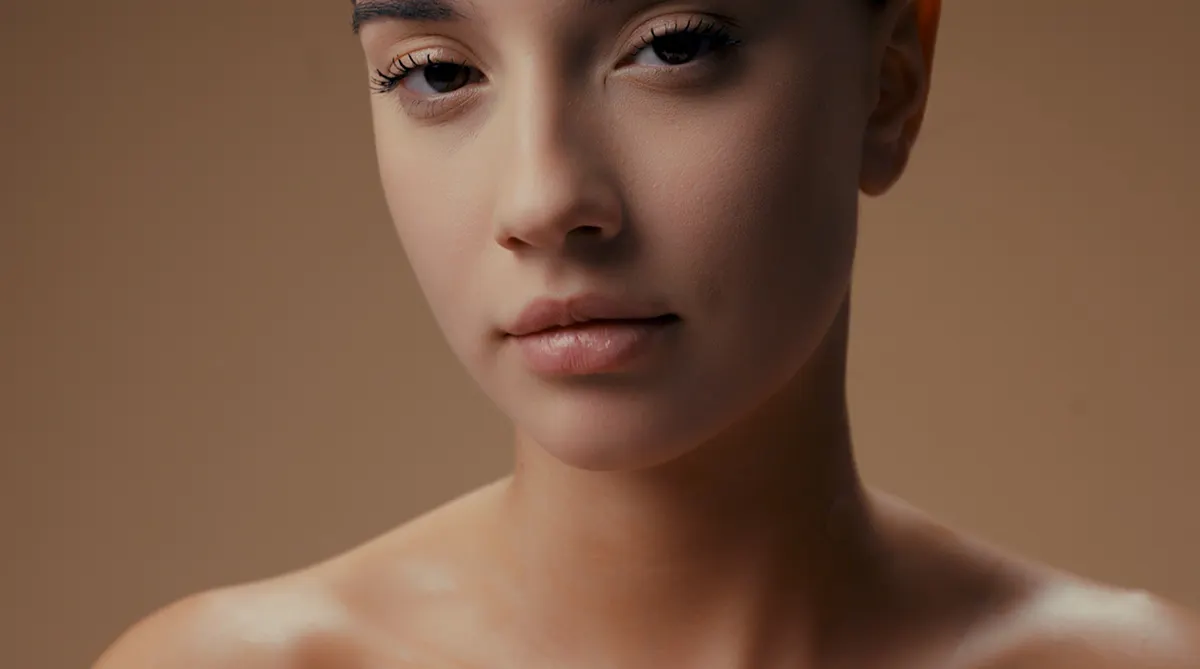
Before & After
In this portrait, the fine detail (pores and microtexture of the skin) has been slightly enhanced, while medium-sized details (wrinkles and skin imperfections) and large-scale details (the overall lighting pattern) have been significantly softened. The effect is substantially reduced in the shadows and, to some extent, in the midtones and highlights. To preserve a natural look, the overall effect of the Acutance tool has been slightly reduced.
Example of using the Acutance tool with inverted Skin Mask:
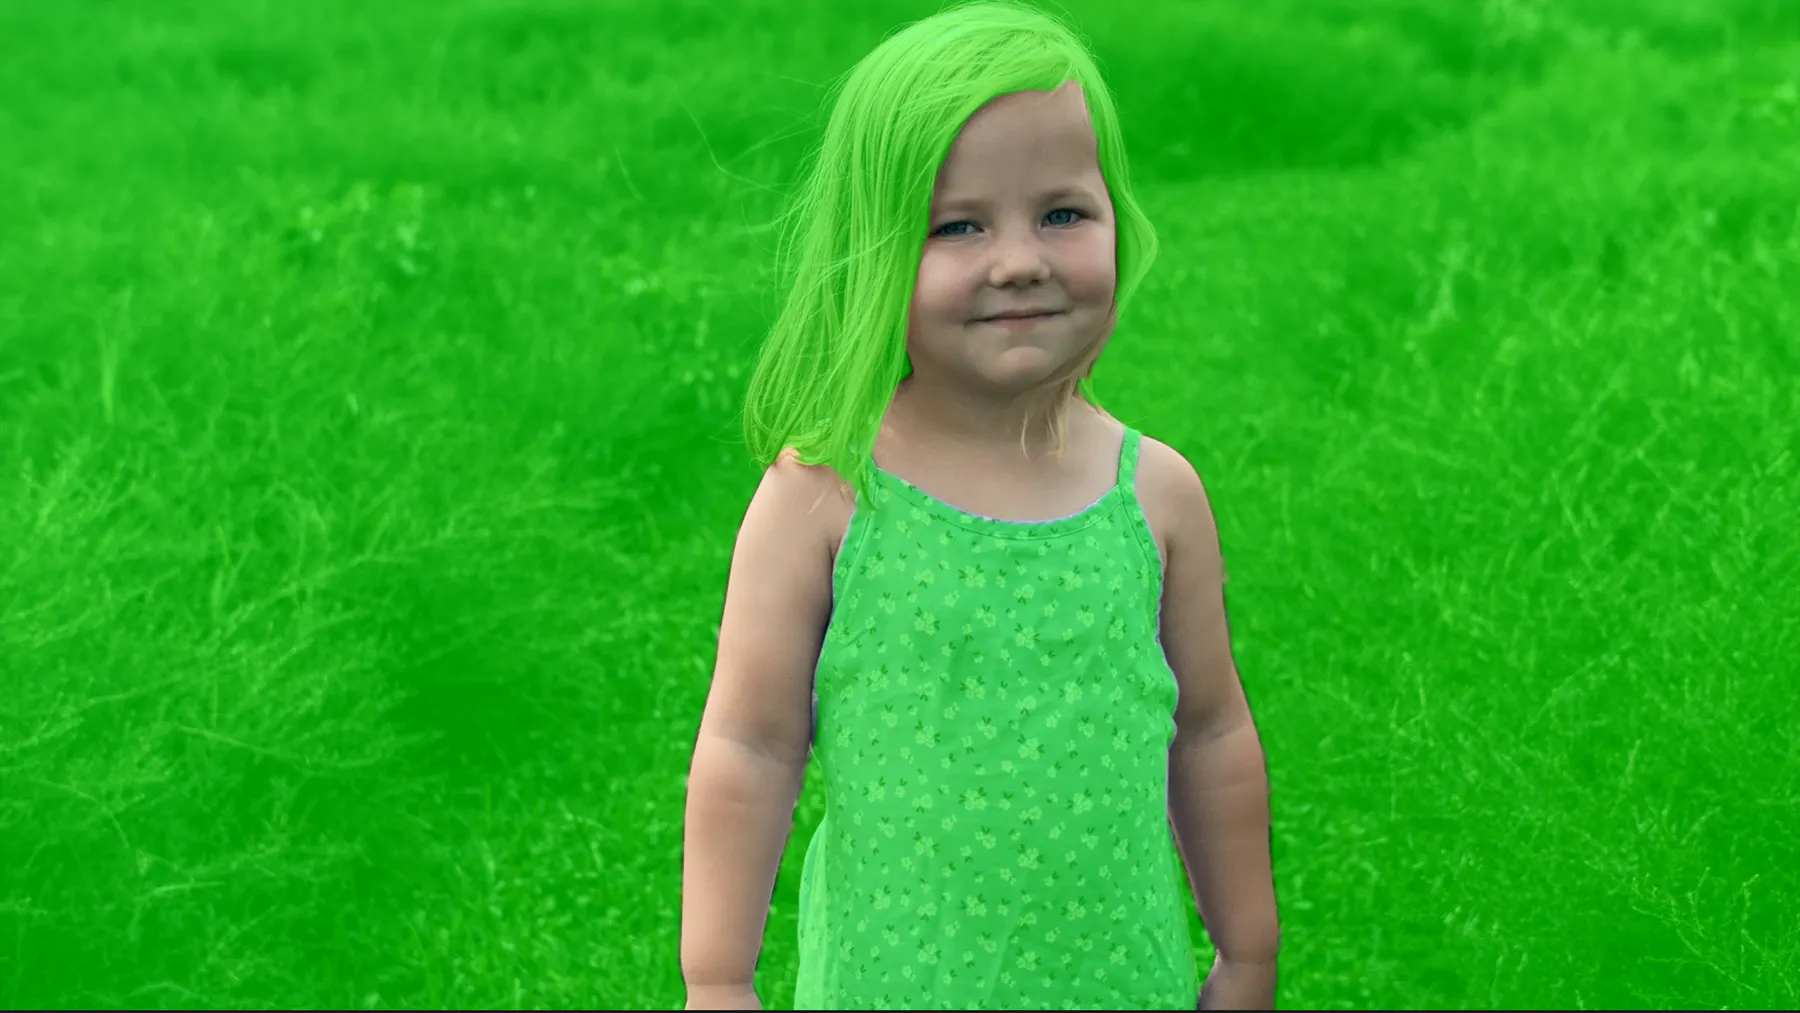
Inverted mask without subtracting the eyes and mouth
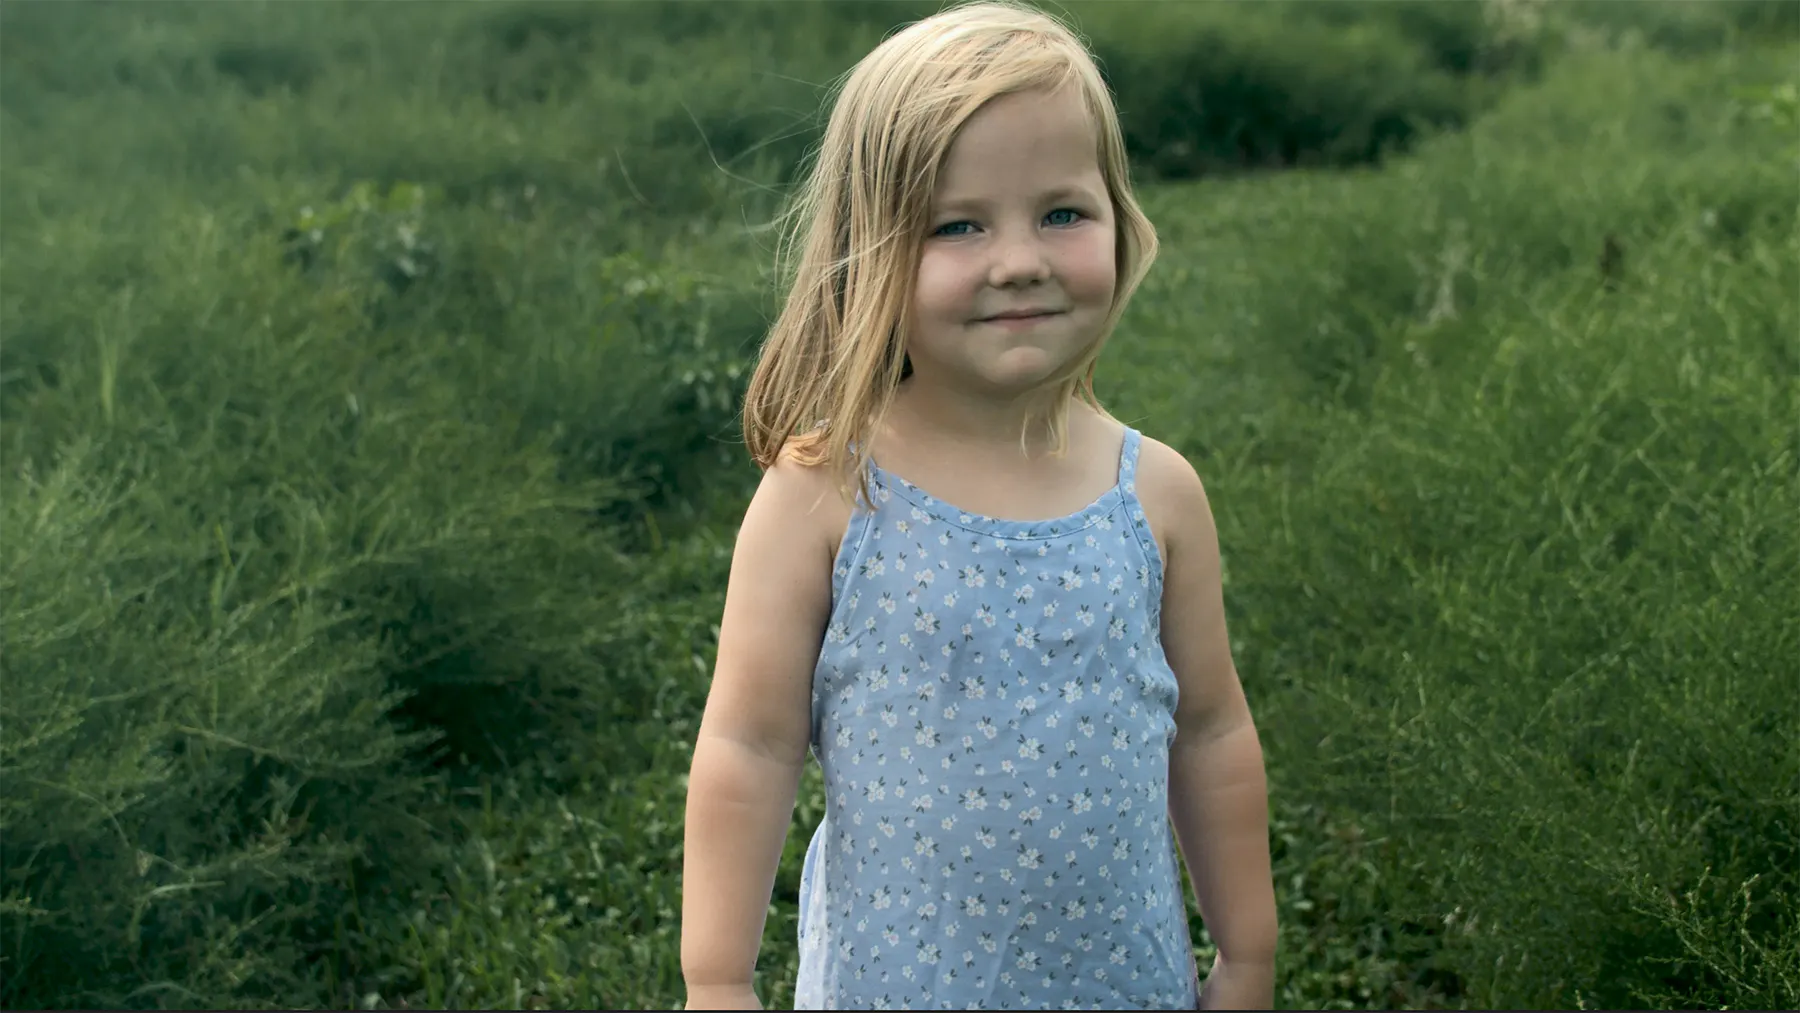
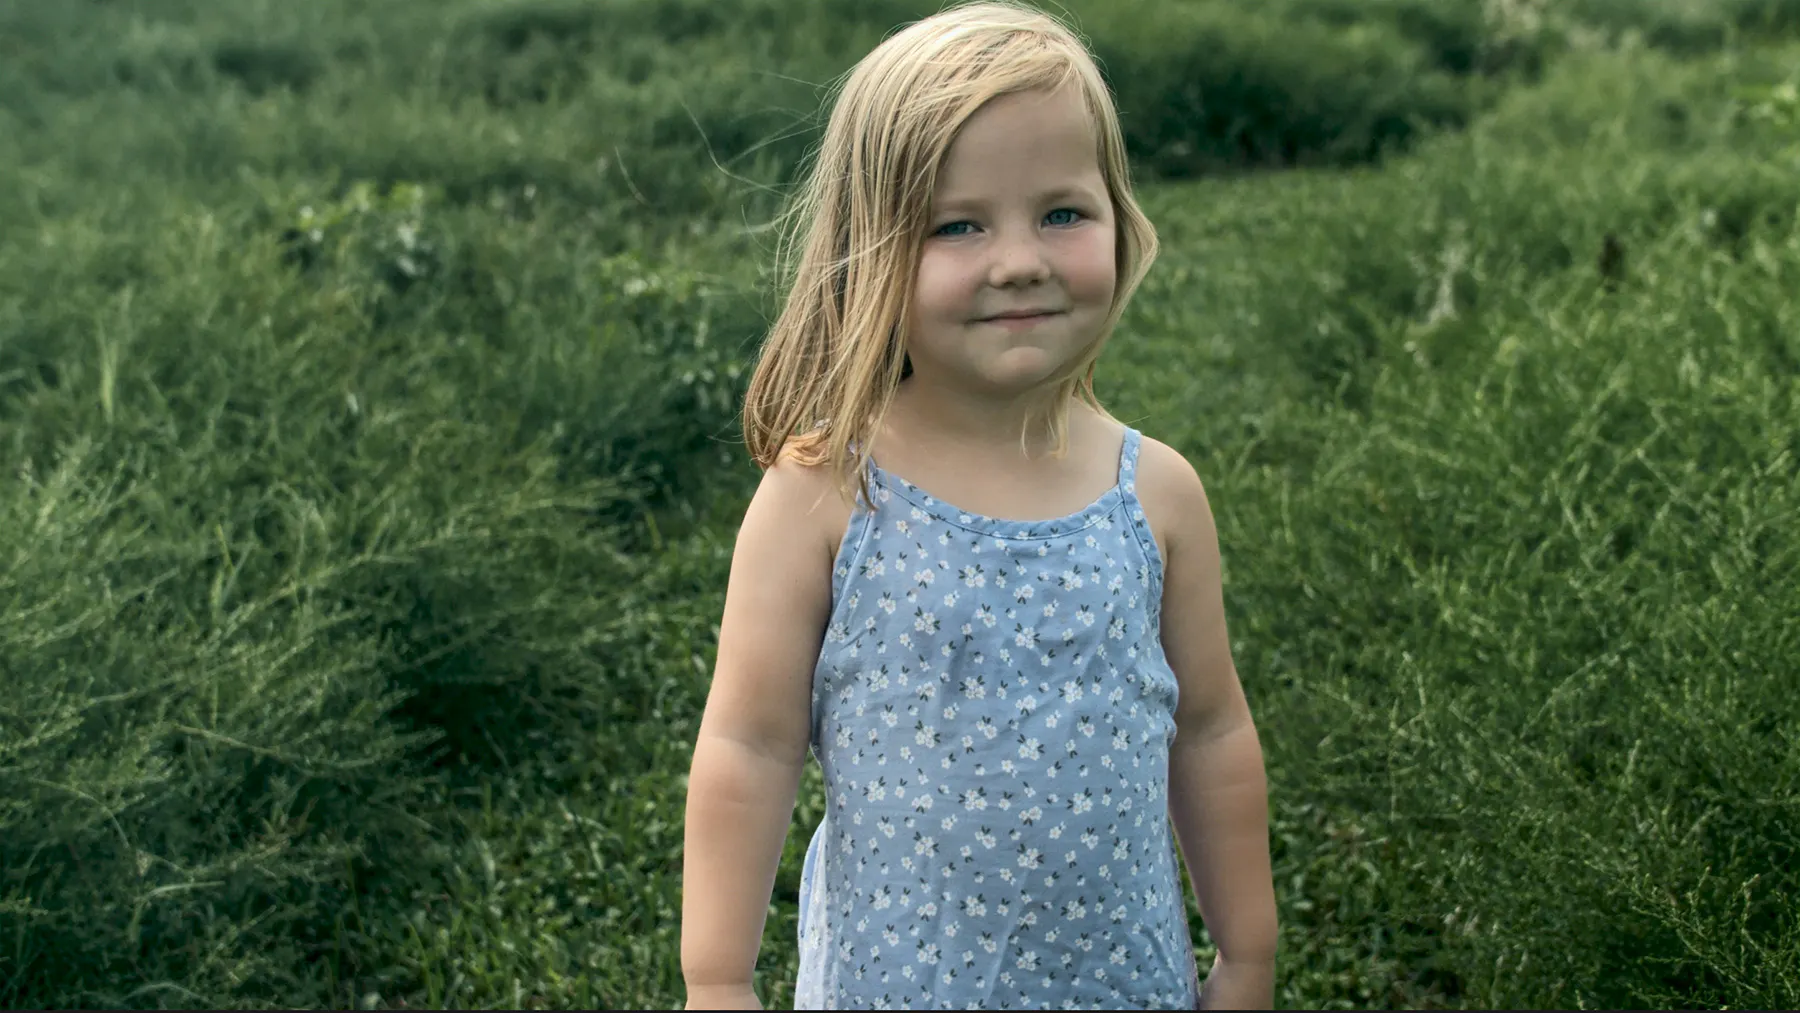
Before & After
To deal with the messy grass background, the level of medium and large detail has been increased. This also accentuates the texture of the dress. Additionally, the level of fine detail has been slightly increased to improve the hair sharpness.
The effect has been slightly reduced in highlights and midtones. To preserve a natural look, the overall effect has been slightly reduced. The adjustments do not affect the face, eyes, mouth, or hands.
The Mach Bands effect compensation
Due to the phenomenon of lateral inhibition of signals in the retina, our perception enhances microcontrast along the edges of high-contrast areas (such as the boundaries of objects) – this is a feature of the human vision. As a result, we perceive these edges as having greater contrast than they actually do.
In Dehancer the algorithms implemented under the hood of the Acutance tool take into account and compensate for the visual effect known as Mach Bands.
When the acutance is increased, this effect can become more pronounced and lead to a false perception of halos along contrasting edges. Dehancer takes this into account and prevents them from appearing.
Authors: © Pavel Kosenko, © Dmitry Novak
Download Dehancer 8.0.0 Beta 1 for DaVinci Resolve
Notes:
- Windows, Linux: Cuda only
Please expect OpenCL support in the next beta releases. - Subscriptions plans only for activation
Please expect support for converting your Lifetime license to a Lifetime subscription in the near future.