Author: Nikita Miroshnikov

I started shooting videos about eleven years ago. My first camera was the original Blackmagic Pocket. Only 1080p, but it shot RAW, which meant I had to learn DaVinci Resolve whether I wanted to or not. I’d make proxies, cut in Final Cut, send the timeline to Resolve to do the color, then bring it back. Editing inside Resolve wasn’t really a thing yet, but every pro I admired graded there, so I followed the pros.
Introduction
Color grading and color correction are two essential stages in the post-production workflow. They serve different purposes and require distinct approaches. Mastering the difference between them is a key step toward achieving professional-quality visual results and maintaining consistency across a project.
This guide explains what each process entails, how they fit into the broader post-production pipeline, and what tools, techniques, and considerations are required to use them effectively.
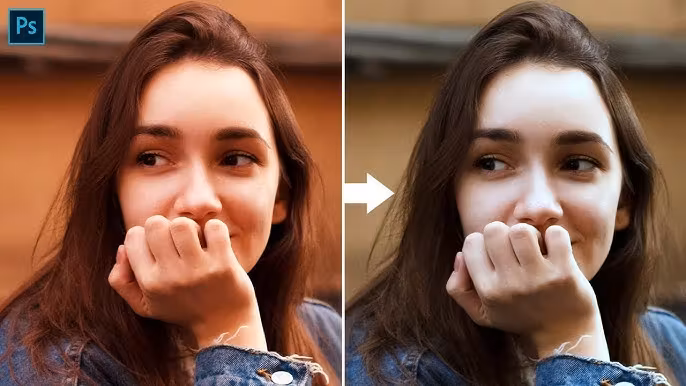
Color Correction in Photoshop
What is Color Correction?
Color correction is the technical phase of color work. Its primary goal is to bring all footage into a neutral, balanced, and consistent state, regardless of the camera, lighting conditions, or file format. This phase is not about creating a "look", but about fixing issues and establishing a reliable visual baseline.
Typical tasks in this phase include adjusting white balance to neutralize temperature shifts, setting exposure using waveform and histogram tools, converting footage from LOG, RAW, or HDR formats into a standard working color space such as Rec.709, and matching shots from different angles or cameras. Additional steps involve correcting color casts, restoring detail in highlights and shadows, and ensuring that skin tones appear natural and consistent.
Scopes are essential at this stage. The waveform monitor helps set accurate luminance levels, the vectorscope confirms color balance and skin tone alignment, and the RGB parade reveals channel discrepancies to identify and fix color imbalances.
Footage should be grouped into "shot families" based on lighting, scene, or camera setup, so batch corrections can be applied efficiently. These corrections must be performed in a neutrally lit environment with consistent conditions. Professional setups often include calibrated reference monitors, bias lighting set to 6500K, and controlled ambient surroundings.
Using scopes instead of relying solely on visual judgment ensures a more objective workflow. Regular breaks are recommended to maintain color perception accuracy, especially during long grading sessions.
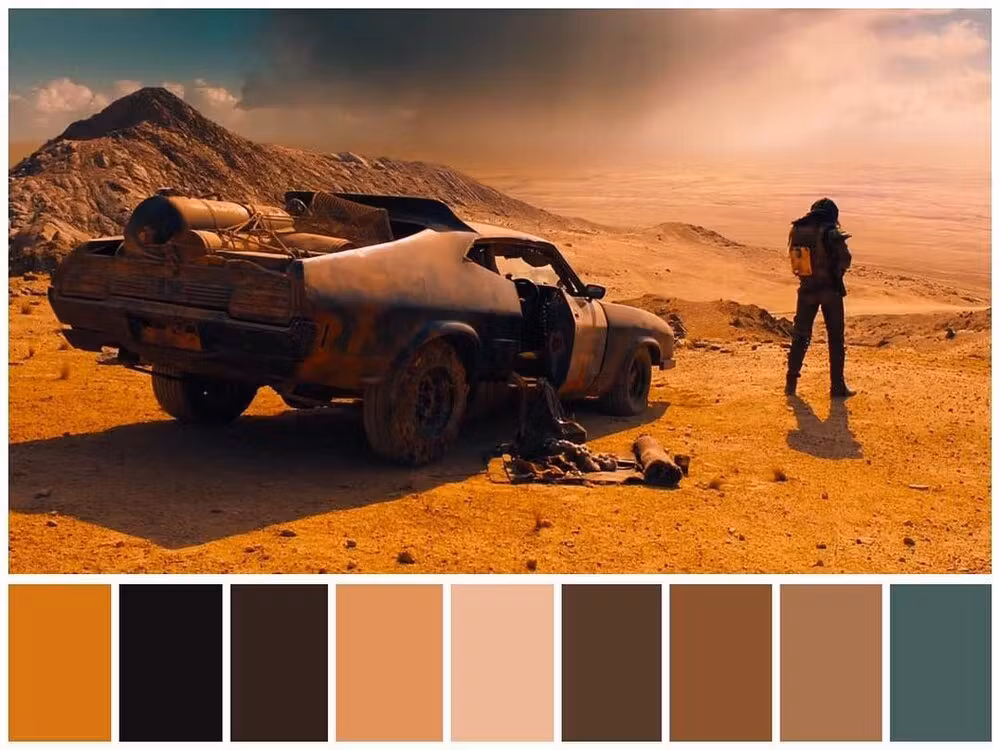
Mad Max Fury Road Color Palette (2015)
What is Color Grading?
Color grading is the creative phase where visual storytelling is enhanced through stylistic color adjustments. Once technical correction is complete, grading allows the filmmaker or colorist to craft the emotional tone, atmosphere, and aesthetic of each scene.
Grading can involve shifting the overall color temperature to support the mood: warmer tones for comfort or nostalgia, cooler tones for isolation or tension. Stylized palettes such as teal and orange, high contrast black-and-white, or faded vintage looks are used to evoke specific feelings. Colorists often isolate and enhance elements like skies, brand colors, or skin tones. Additional techniques include modifying contrast curves and saturation levels to add drama, applying creative LUTs or building custom looks, and simulating film characteristics like halation, bloom, grain, and gate weave.
These effects are typically achieved using tools such as primary wheels, lift/gamma/gain controls for tonal range, curves for detailed hue and contrast control, and qualifiers or masks for isolating regions of the image. Node-based workflows, such as those in DaVinci Resolve, allow colorists to build complex grades with modular precision.
Plugins like Dehancer, FilmConvert, and Magic Bullet Looks extend creative possibilities by offering analog film emulation and texture tools. These should be applied only after correction to avoid amplifying issues in the image.


Original and color graded image
Workflow Considerations and Color Environments
A successful color workflow depends not only on the software and grading tools, but also on the workspace, hardware setup, and shot organization.
Colorists must work in a controlled, color-accurate environment. This includes neutral walls, consistent ambient lighting set to around 6500K, and a calibrated reference monitor that supports the appropriate color space - Rec.709 for SDR work or P3-D65 for HDR. Calibration tools such as CalMAN, LightSpace, or DisplayCAL are recommended for maintaining display accuracy.
Footage should be organized by location, lighting condition, or camera setup to streamline grading and ensure shot-to-shot consistency. By grouping similar footage into logical families, batch-level corrections can be made more efficiently.
Regular use of scopes: waveform monitors for luminance, vectorscopes for hue and saturation, and RGB parade for channel balance ensures accurate results. These objective tools are essential for building a consistent and professional grade across an entire project.
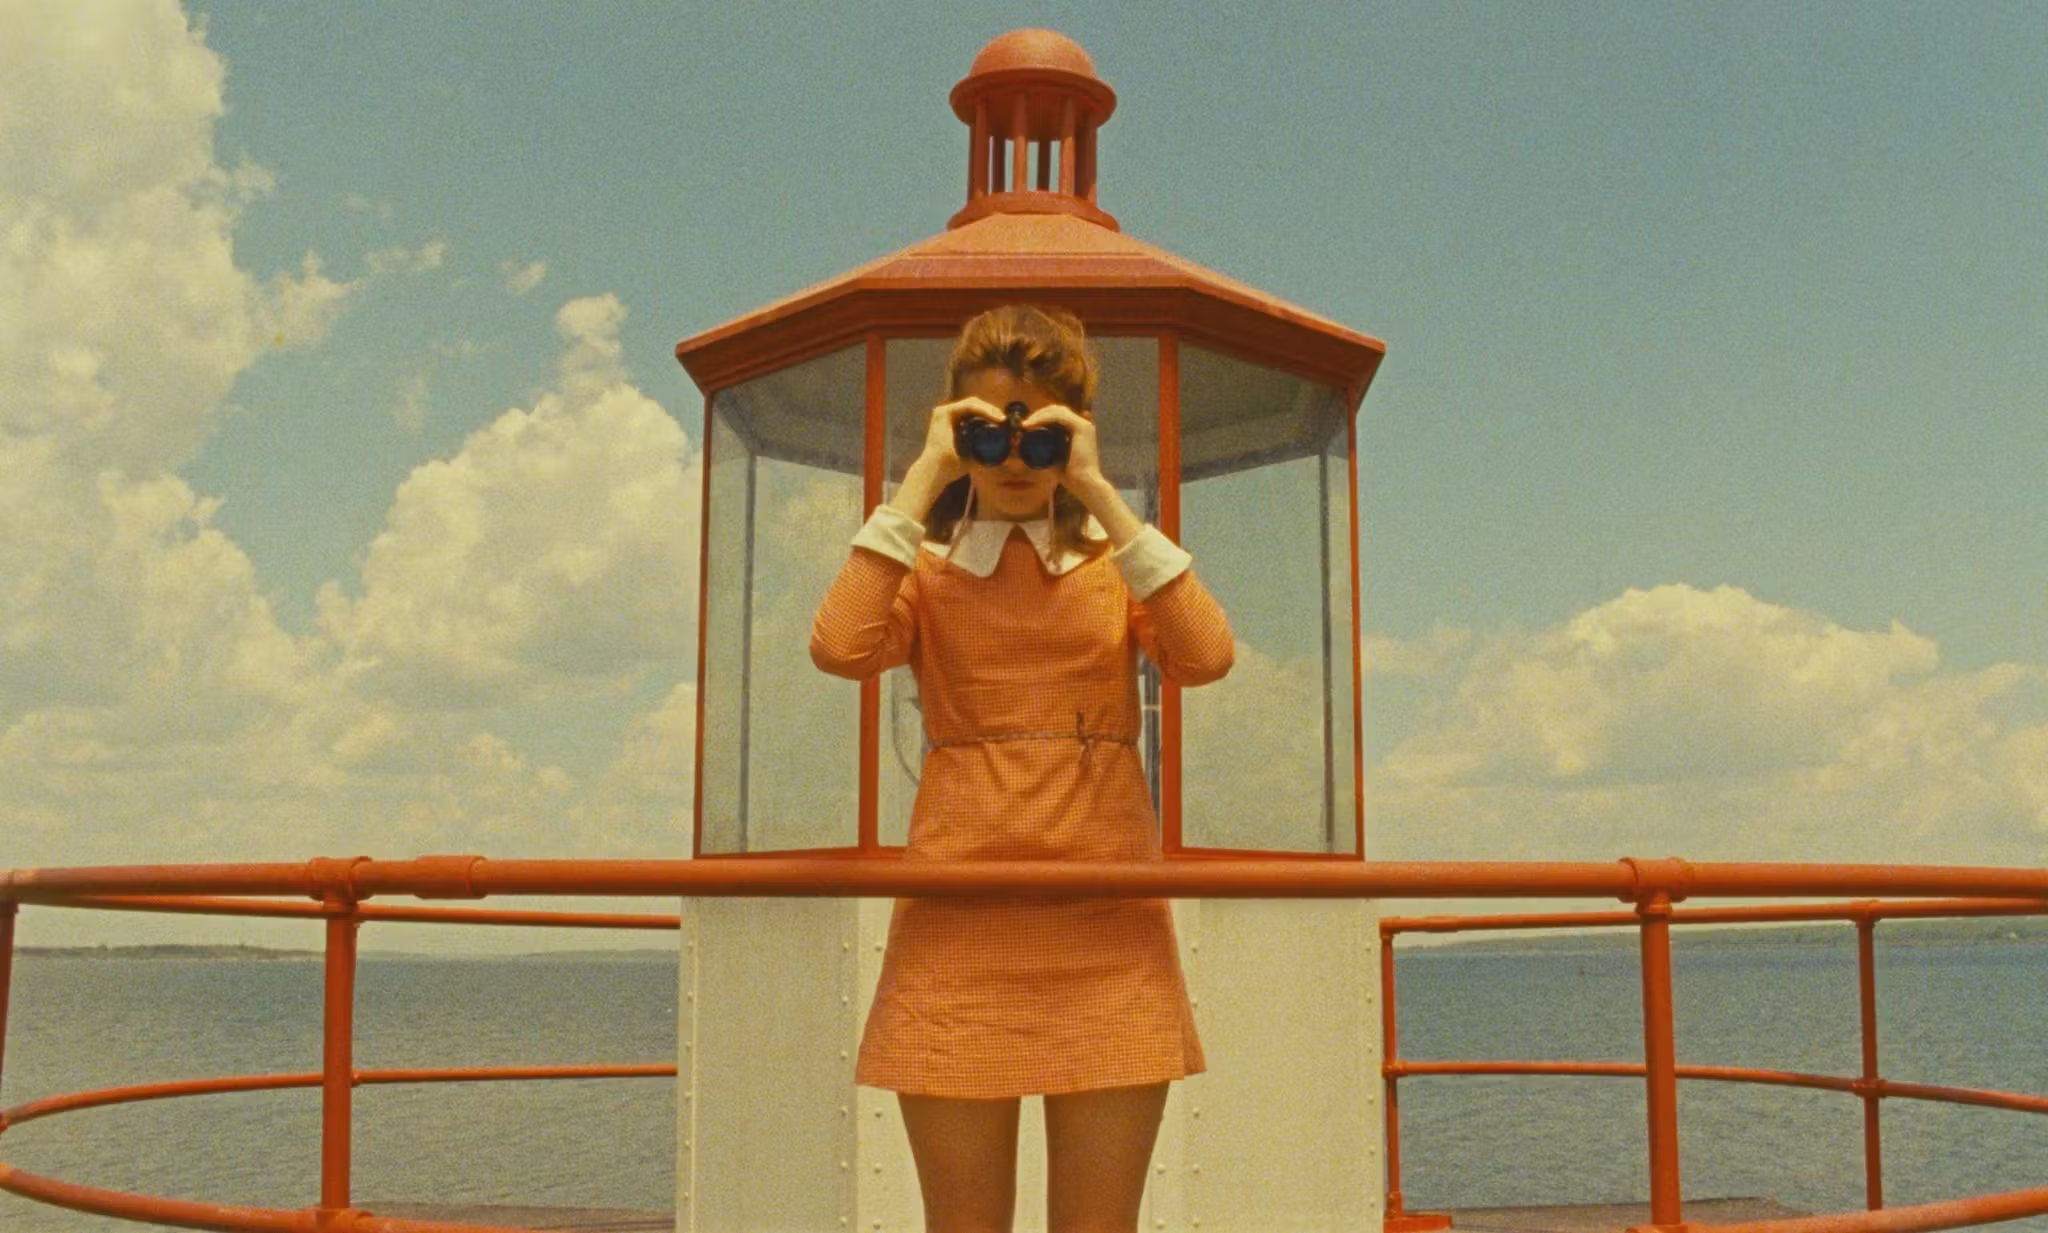
Moonrise Kingdom, Wes Anderson (2012)
Reference Use and Training
Using visual references is a valuable technique for guiding grading decisions and developing a consistent aesthetic. References might include film stills, photography, previous projects, or branded materials.
A useful training exercise is to select a frame from a professional production, analyze the lighting, color palette, and contrast structure, then attempt to replicate that look in your own timeline using comparable footage. This process develops both technical control and visual literacy.
Many professional colorists share node structures and workflow breakdowns online, which can be studied and reverse-engineered. Platforms such as Lowepost, Mixing Light, ShotDeck, and Frame.io provide tutorials, case studies, and reference libraries useful for colorist development.
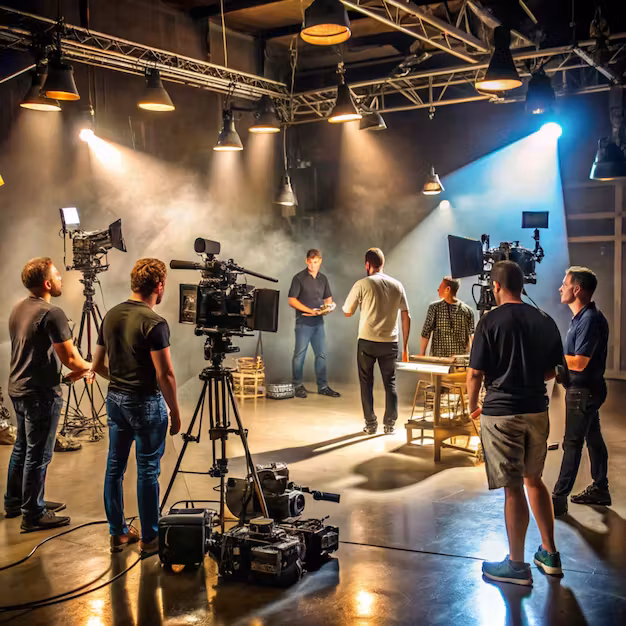
Film crew on set
Collaboration and the Role of the Colorist
In professional workflows, color is rarely a solo activity. A colorist works in close collaboration with directors, cinematographers, editors, and VFX supervisors to interpret creative intent and deliver technically sound and visually consistent results.
The colorist’s responsibilities may include preserving visual continuity, maintaining compliance with broadcast or delivery specifications, and ensuring that the final grade aligns with the project's narrative and stylistic goals. They also manage technical aspects of versioning, conforming timelines, and rendering for SDR, HDR, DCP, and other formats.
Clear communication and a structured workflow are essential in multi-role environments. A strong colorist must balance creative sensitivity with technical expertise and deliver polished results on time.